Rivastigmine Patch
Product Images NDC 0378-9072
Product Visual Gallery
This gallery contains 20 technical images submitted to the FDA as part of the official labeling for Rivastigmine (NDC 0378-9072). Unlike standard consumer photos, these assets often include clinical data figures, molecular chemical structures, and official manufacturer packaging layouts.
As provided by Mylan Pharmaceuticals Inc., these visuals offer a comprehensive scientific overview of the product's physical and chemical identity, aiding pharmacists and researchers in product verification and study.
Product Images & Figures Index
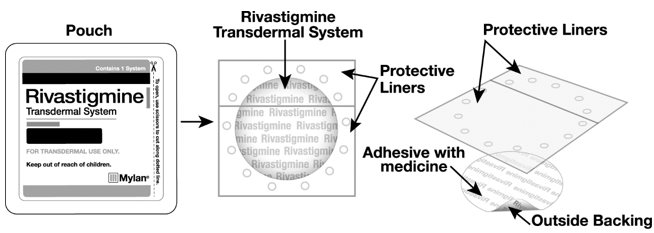
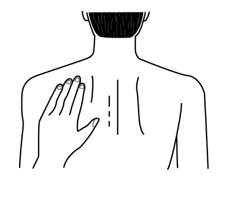
Instructions For Use Figure B (Image 02)
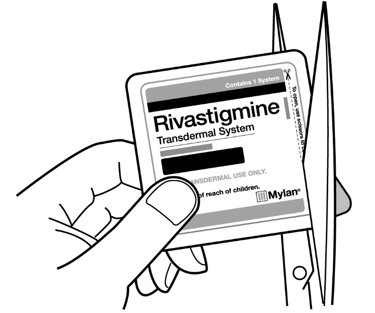
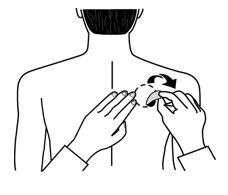
Instructions For Use Figure C (Image 03)
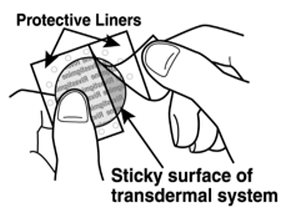
Instructions For Use Figure D (Image 04)
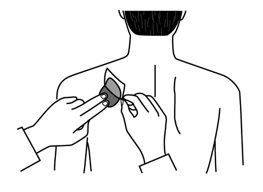
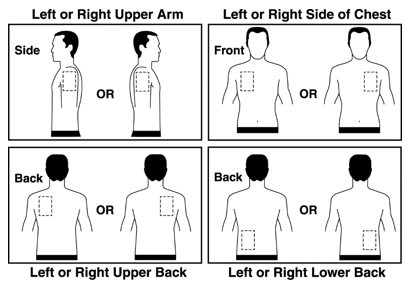
Instructions For Use Figure E (Image 05)
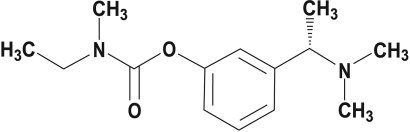
Rivastigmine Structural Formula (Image 06)
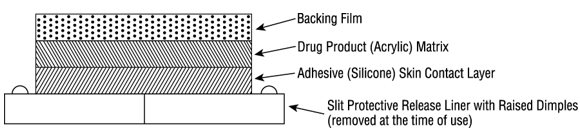
Figure 1: Cross Section Of The Rivastigmine Transdermal System (Image 07)
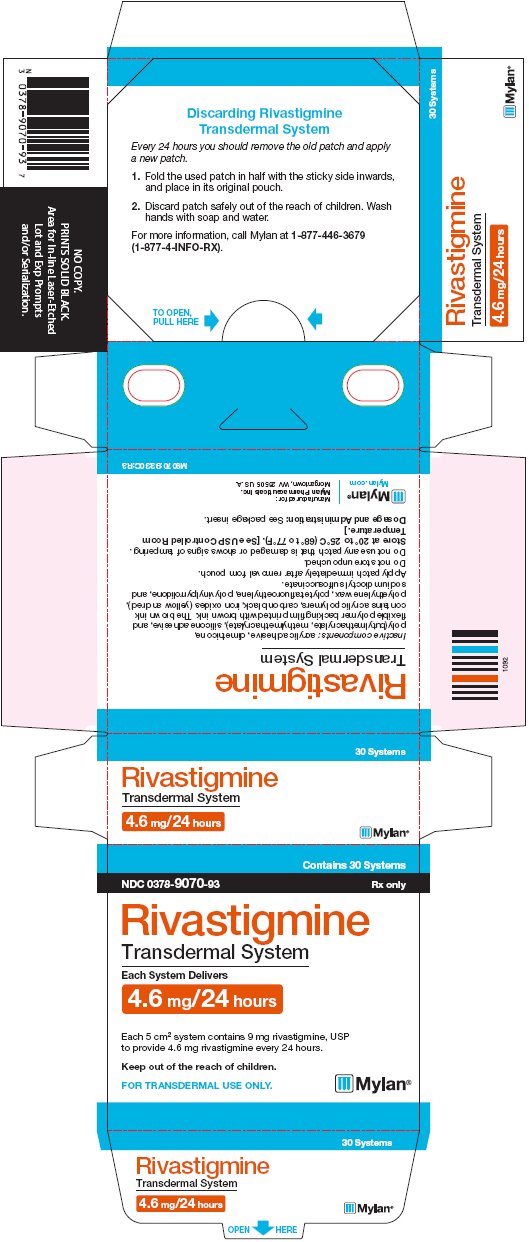
Rivastigmine Transdermal System 4.6 mg/24 Hours Carton Label (Image 08)
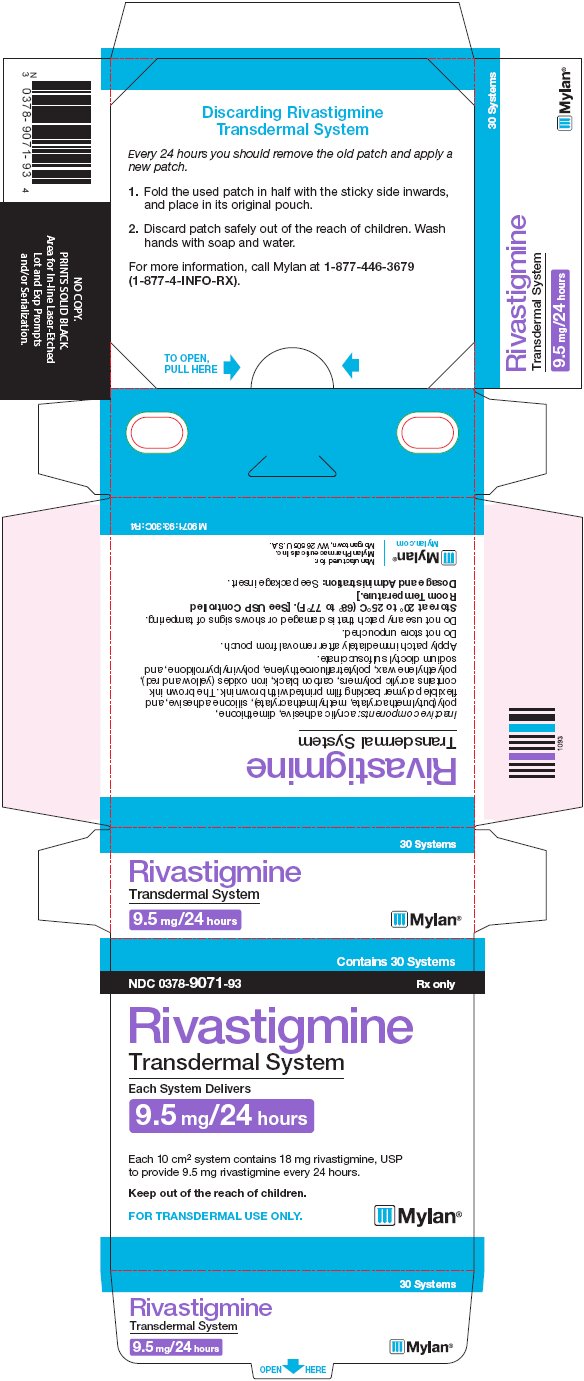
Rivastigmine Transdermal System 9.5 mg/24 Hours Carton Label (Image 09)
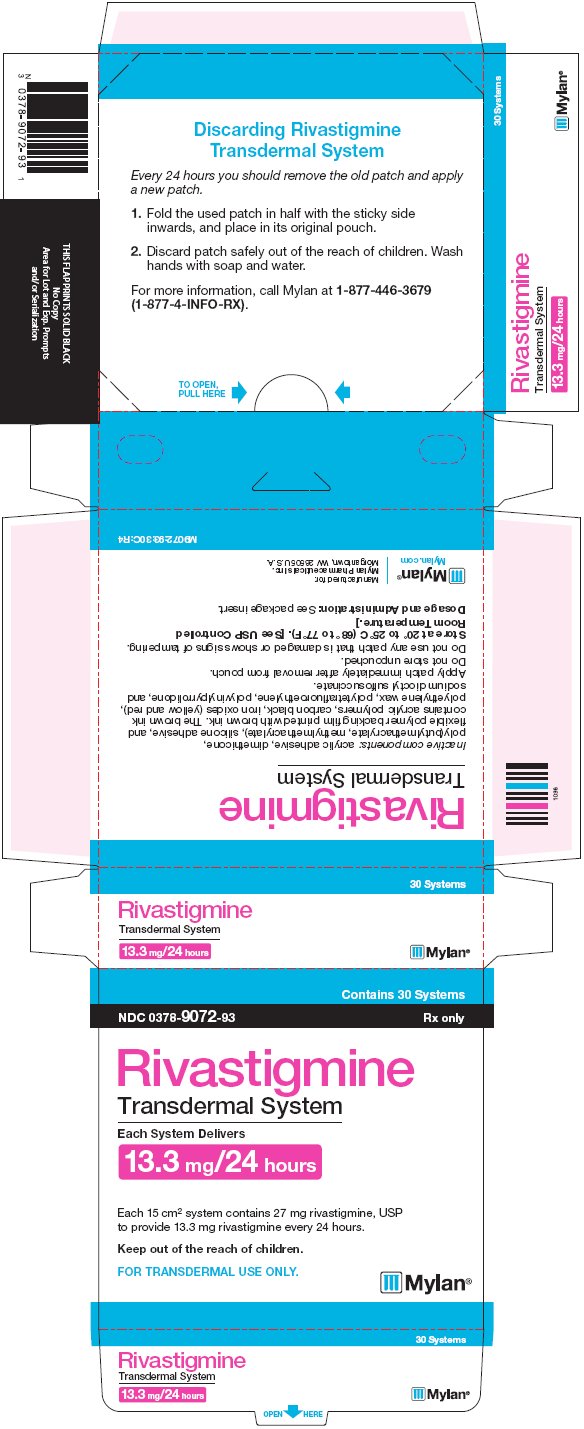
Rivastigmine Transdermal System 13.3 mg/24 Hours Carton Label (Image 10)
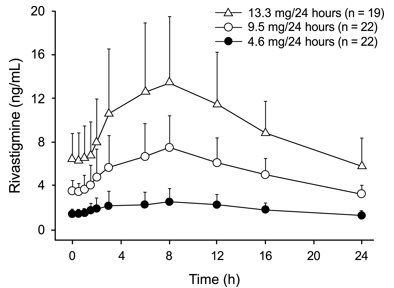
Figure 2: Rivastigmine Plasma Concentrations Following Dermal 24-hour Transdermal System Application (Image 11)
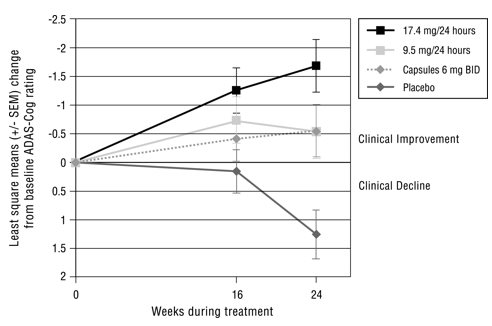
Figure 3: Time Course Of The Change From Baseline In Adas-cog Score For Patients Observed At Each Time Point In Study 1 (Image 12)
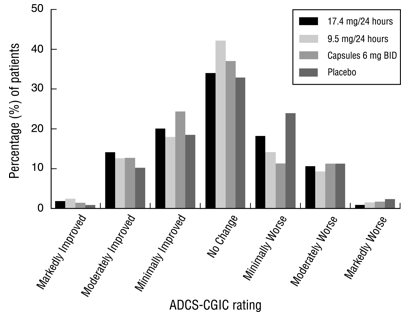
Figure 4: Distribution Of Adcs-cgic Scores For Patients Completing Study 1 (Image 13)
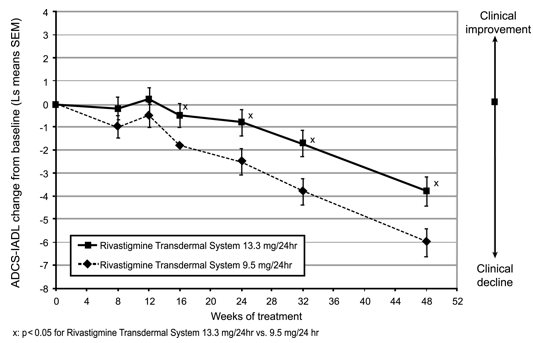
Figure 5: Time Course Of The Change From Double-blind Baseline In Adcs-iadl Score For Patients Observed At Each Time Point In Study 2 (Image 14)
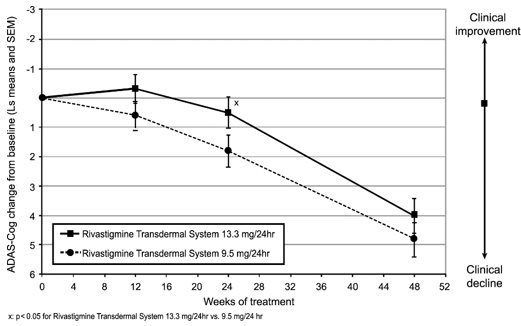
Figure 6: Time Course Of The Change From Double-blind Baseline In Adas-cog Score For Patients Observed At Each Time Point In Study 2 (Image 15)
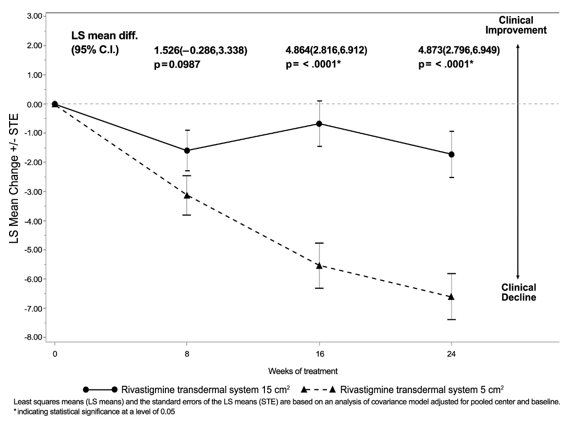
Figure 7: Time Course Of The Change From Baseline In Sib Score For Patients Observed At Each Time Point (modified Full Analysis Set–locf) (Image 16)
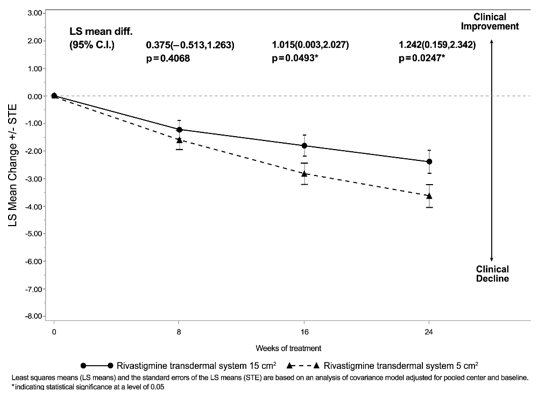
Figure 8: Time Course Of The Change From Baseline In Adcs-adl-siv Score For Patients Observed At Each Time Point (modified Full Analysis Set–locf) (Image 17)
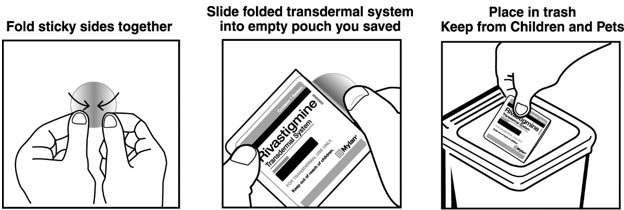
Instructions For Use Figure F (Image 18)
Instructions For Use Figure G (Image 19)
Instructions For Use Figure H (Image 20)
* About these descriptions: Image descriptions on this page are generated by automated AI analysis of the product label images from the manufacturer's FDA label submission (SPL). They are provided for reference only and may contain errors or omissions. Always rely on the printed label itself and the official FDA labeling, and consult a pharmacist or healthcare professional with any questions about this product.