Asenapine Tablet
Product Images NDC 46708-199

View Photos of Packaging, Regulatory Labels, and Product Appearance

Product Visual Gallery

This gallery contains 14 technical images submitted to the FDA as part of the official labeling for Asenapine (NDC 46708-199). Unlike standard consumer photos, these assets often include clinical data figures, molecular chemical structures, and official manufacturer packaging layouts.

As provided by Alembic Pharmaceuticals Limited, these visuals offer a comprehensive scientific overview of the product's physical and chemical identity, aiding pharmacists and researchers in product verification and study.

FDA Label Image

Asenapine-10mg.jpg (Asenapine 10mg)
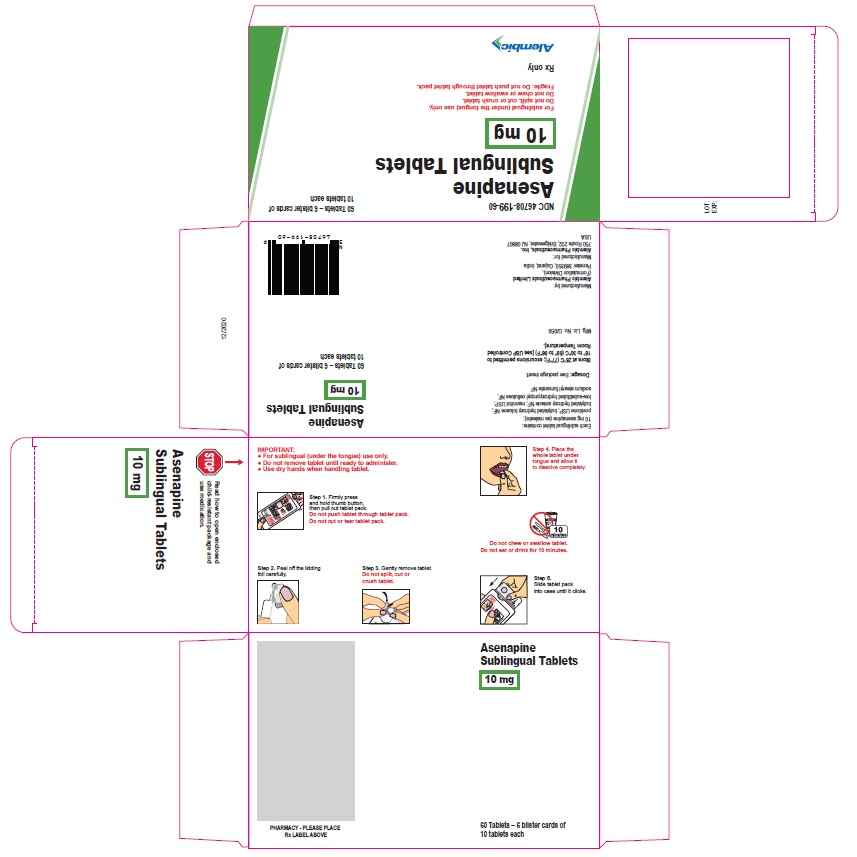
Asenapine-10mg.jpg (Asenapine 10mg)
Packaging label for Asenapine Sublingual Tablets 10 mg by Alembic Pharmaceuticals Limited. The label shows the product name, strength, dosage form, and quantity as 60 tablets in 6 blister cards of 10 tablets each. Instructions emphasize sublingual use only, with visual steps illustrating tablet removal and administration. The label includes warnings against chewing, swallowing, eating, or drinking for 10 minutes after use.*
FDA Label Image

Asenapine 25mg

Asenapine 25mg
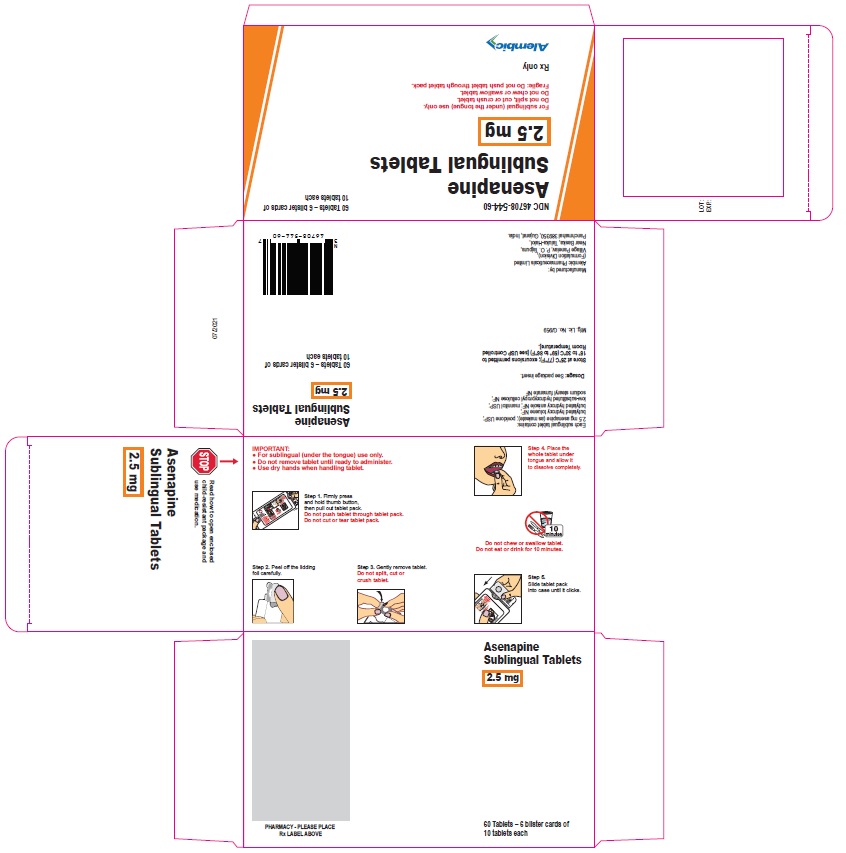
Asenapine Sublingual Tablets 2.5 mg packaging label for 60 tablets in 6 blister cards of 10 tablets each. The label includes handling instructions, dosage form as sublingual tablets, and manufacturer Alembic Pharmaceuticals Limited. The package label features illustrations for tablet removal and administration and warns to use the tablet only under the tongue without chewing or swallowing.*
FDA Label Image

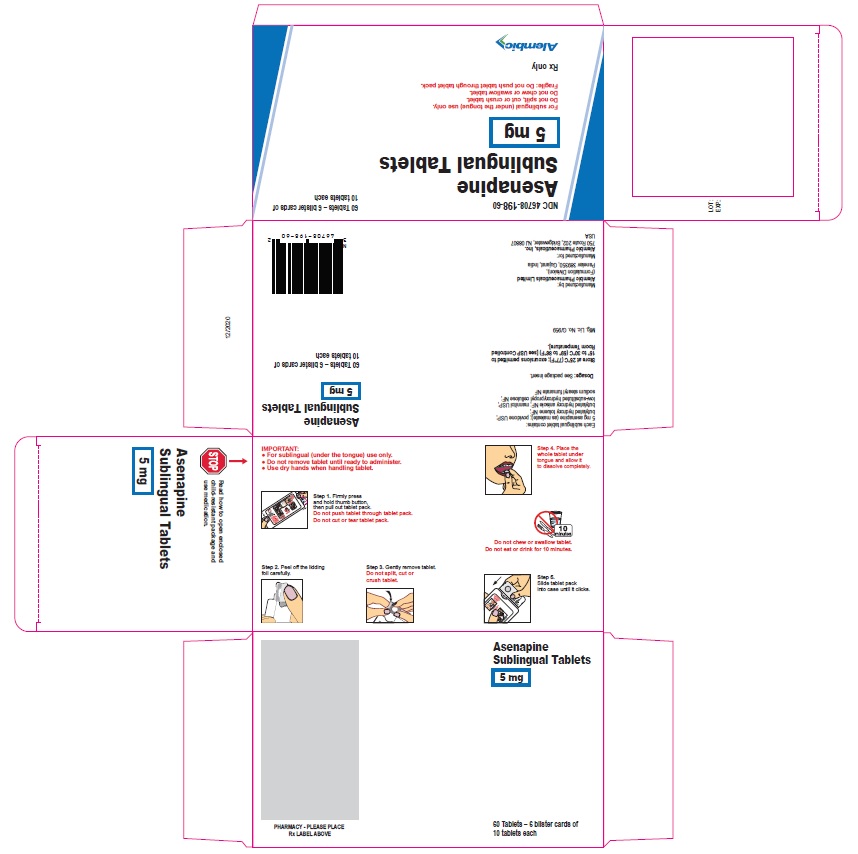
Asenapine-5mg.jpg (Asenapine 5mg)

Asenapine-5mg.jpg (Asenapine 5mg)
Packaging label for Asenapine Sublingual Tablets 5 mg by Alembic Pharmaceuticals Limited. The label indicates 60 tablets in 6 blister cards of 10 tablets each. It includes usage instructions for sublingual administration, warnings not to cut or crush tablets, and a barcode. The design features a stop sign icon and blue accent bars.*
FDA Label Image

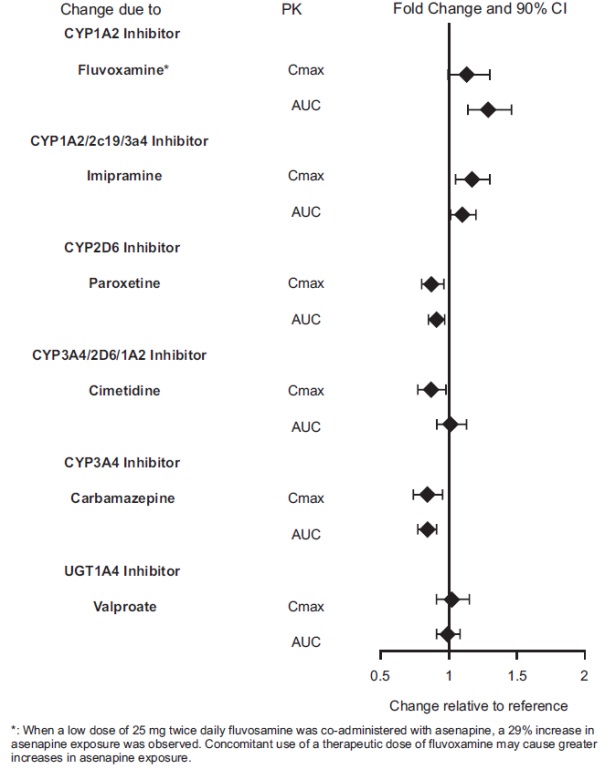
Asenapine Figure1

Asenapine Figure1
A fold change chart depicting the effect of various CYP inhibitors on Asenapine pharmacokinetics. The chart compares the fold change in maximum concentration (Cmax) and area under curve (AUC) with 90% confidence intervals for inhibitors like Fluvoxamine, Imipramine, Paroxetine, Cimetidine, Carbamazepine, and Valproate relative to reference values.*
FDA Label Image

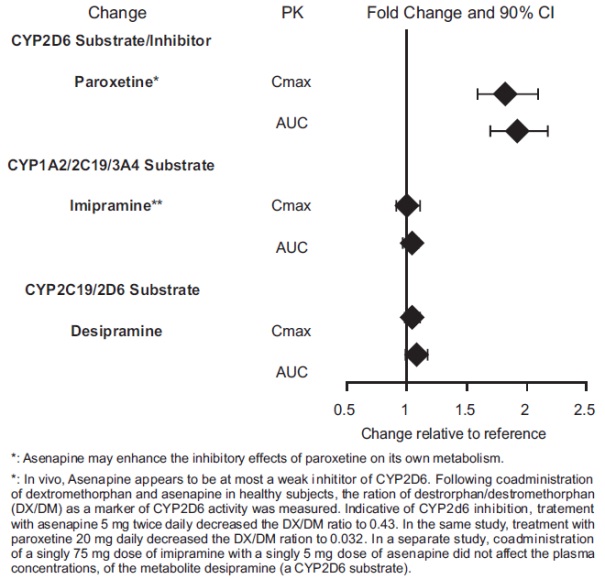
Asenapine Figure2

Asenapine Figure2
A horizontal forest plot depicting fold changes and 90% confidence intervals in pharmacokinetic parameters (Cmax and AUC) for CYP2D6, CYP1A2/2C19/3A4, and CYP2C19/2D6 substrates with and without asenapine coadministration. Drugs analyzed include paroxetine, imipramine, and desipramine, showing relative changes in exposure compared to reference.*
FDA Label Image

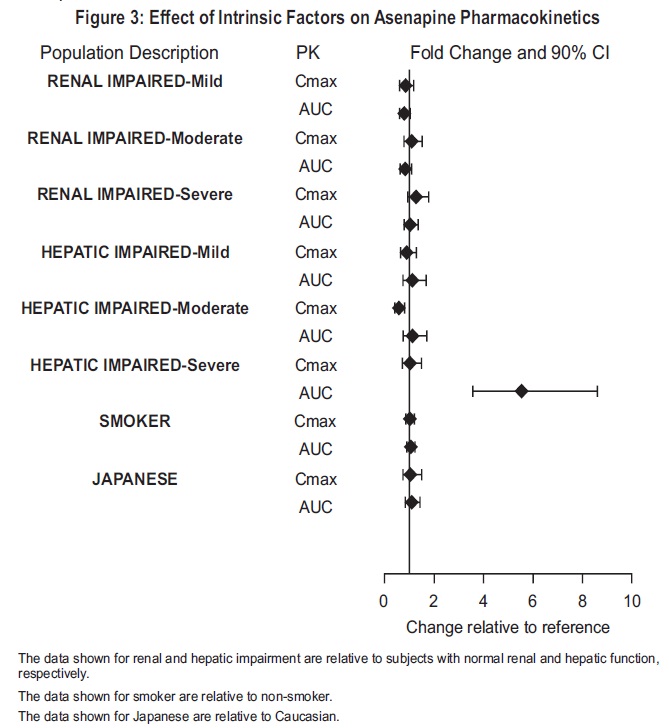
Asenapine Figure3

Asenapine Figure3
A chart titled 'Effect of Intrinsic Factors on Asenapine Pharmacokinetics' showing fold changes and 90% confidence intervals for Cmax and AUC values in populations with varying renal and hepatic impairments, smokers, and Japanese subjects relative to reference groups. The x-axis represents change relative to reference, ranging from 0 to 10.*
FDA Label Image

Asenapine Figuree

Asenapine Figuree
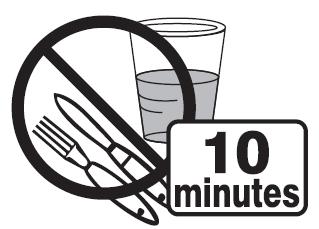
Instructional illustration showing a crossed-out image of eating utensils and a glass of water, with a label indicating '10 minutes.' This likely advises against eating or drinking for 10 minutes after medication administration.*
FDA Label Image

Figure A (Asenapine Figurea)

Figure A (Asenapine Figurea)
Illustration showing how to open a tablet pack case by pressing the thumb button and pulling to dispense tablets. The diagram includes step-by-step pictorial instructions for use, focusing on the mechanics of opening and removing tablets from the pack.*
FDA Label Image

Step 2 (Asenapine Figureb)

Step 2 (Asenapine Figureb)
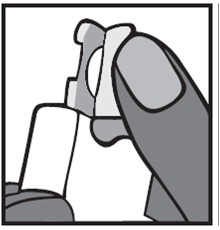
Illustration showing a hand holding a tablet partially removed from blister packaging, demonstrating how to peel back the foil to access the sublingual Asenapine tablet.*
FDA Label Image

Step 3 (Asenapine Figurec)

Step 3 (Asenapine Figurec)
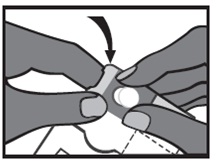
An instructional illustration showing two hands opening a blister pack to remove a single tablet. The image likely depicts how to access a sublingual tablet from its packaging for administration.*
FDA Label Image

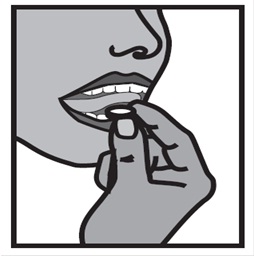
Asenapine Figured

Asenapine Figured
An instructional illustration showing a person holding a sublingual tablet with their fingers near the mouth, about to place it under the tongue. The image emphasizes the sublingual route of administration for the Asenapine tablet.*
FDA Label Image

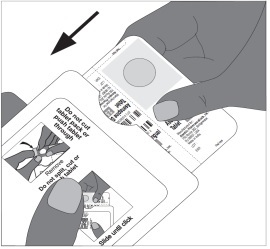
Figure F (Asenapine Figuref)

Figure F (Asenapine Figuref)
An instructional illustration showing a hand removing a blister card from a booklet-type carton. The carton includes printed instructions and warnings about safe use and disposal of the medication packaging.*
FDA Label Image

Structure (Asenapine Structure)

Structure (Asenapine Structure)
Chemical structure of asenapine, depicting its molecular composition including a chlorine atom, aromatic rings, and a methyl group attached to a nitrogen, alongside an acetic acid component.*
FDA Label Image

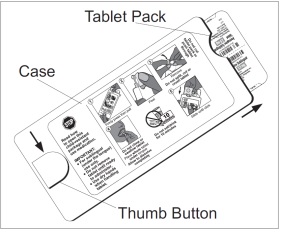
Asenapine Tabletpack

Asenapine Tabletpack
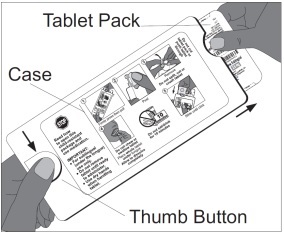
An instructional diagram showing a tablet pack with a case and a thumb button. The image illustrates how to open the tablet pack by pressing the thumb button and removing the tablet. It provides step-by-step visual guidance for accessing the medication in the pack.*

* About these descriptions: Image descriptions on this page are generated by automated AI analysis of the product label images from the manufacturer's FDA label submission (SPL). They are provided for reference only and may contain errors or omissions. Always rely on the printed label itself and the official FDA labeling, and consult a pharmacist or healthcare professional with any questions about this product.