Humira Kit
Product Images NDC 50090-4487

55 FDA label images from A-s Medication Solutions · Packaging, Regulatory Labels, and Product Appearance

Product Visual Gallery

This gallery contains 55 technical images submitted to the FDA as part of the official labeling for Humira (NDC 50090-4487). Unlike standard consumer photos, these assets often include clinical data figures, molecular chemical structures, and official manufacturer packaging layouts.

As provided by A-s Medication Solutions, these visuals offer a comprehensive scientific overview of the product's physical and chemical identity, aiding pharmacists and researchers in product verification and study.

FDA Label Image

Humira 01

Humira 01
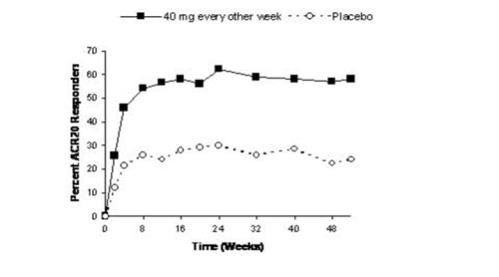
A line graph comparing the percent of ACR20 responders over time (weeks) between two groups: one receiving 40 mg every other week and a placebo group. The 40 mg group shows a higher and sustained response rate across approximately 48 weeks, while the placebo group's response remains lower and more variable.*
FDA Label Image

Humira 02

Humira 02
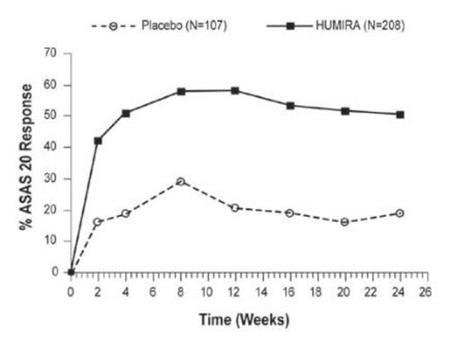
A line graph showing the percentage of ASAS 20 response over time in weeks comparing HUMIRA (adalimumab) with placebo. The x-axis represents time in weeks (0 to 24), and the y-axis shows the percentage of response (0 to 70%). Two lines plot the data: one solid line for HUMIRA and one dashed line for placebo, with the HUMIRA group showing a higher percentage response over the study period.*
FDA Label Image

Humira 03

Humira 03
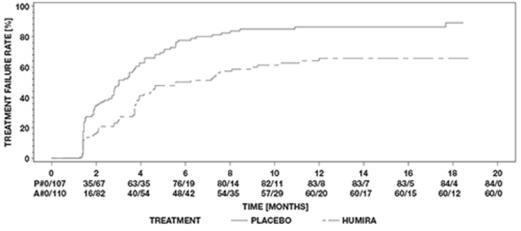
A line graph showing treatment failure rates over time (in months) comparing HUMIRA and placebo treatments. The y-axis represents treatment failure rate percentage, and the x-axis represents time in months. The graph includes numerical data points for both treatments at various time intervals.*
FDA Label Image

Humira 04

Humira 04
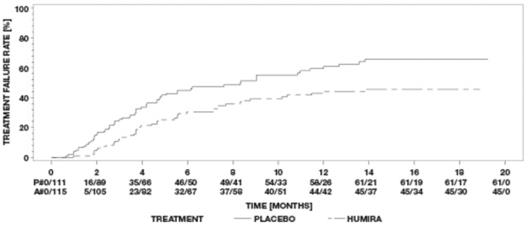
A line graph showing treatment failure rate over time (months) comparing HUMIRA to placebo. The x-axis represents time in months up to 20 months, and the y-axis represents treatment failure rate percentage. Two lines depict the failure rates for placebo and HUMIRA treatments, with HUMIRA showing a lower failure rate over time.*
FDA Label Image

Humira 05

Humira 05
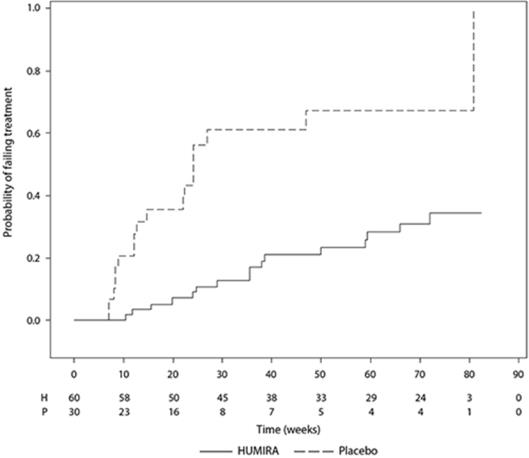
A Kaplan-Meier curve displaying the probability of failing treatment over time in weeks. The graph compares two groups: one treated with HUMIRA and one with a placebo. The y-axis represents the probability of treatment failure, and the x-axis shows time in weeks. Sample sizes at risk for both groups are listed below the graph at several time points.*
FDA Label Image

Humira 06

Humira 06
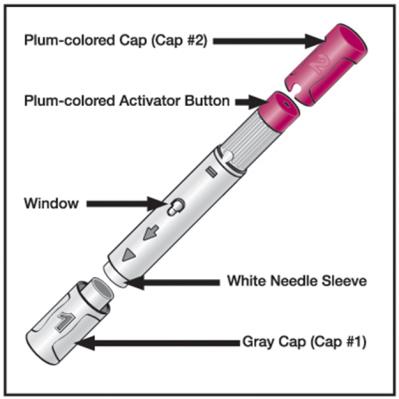
An instructional diagram showing parts of a HUMIRA (adalimumab) injection pen. Labeled components include a plum-colored cap (Cap #2), plum-colored activator button, window, white needle sleeve, and gray cap (Cap #1). The diagram visually guides identification and assembly of the pen device parts in the HUMIRA kit.*
FDA Label Image

Humira 07

Humira 07
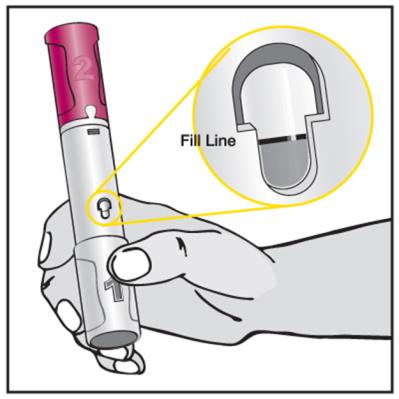
An instructional illustration showing a hand holding a pen-like injection device. A close-up inset highlights a viewing window on the device with a marked fill line, indicating fluid level inside the device.*
FDA Label Image

Humira 08

Humira 08
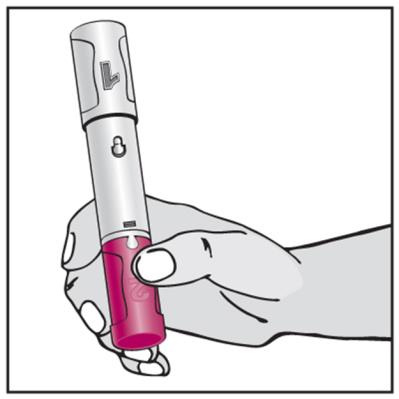
An illustration shows a hand holding a HUMIRA kit device, depicting the proper grip with the thumb pressing on the red area at the bottom of the pen-shaped injector.*
FDA Label Image

Humira 09

Humira 09
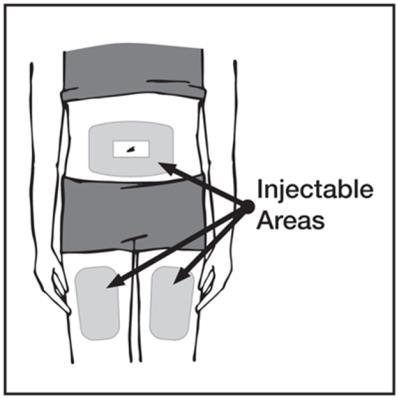
An instructional diagram showing the recommended injectable areas on the human body for administering a medication. Highlighted regions include the abdomen and the front of both thighs with arrows pointing to these injection sites.*
FDA Label Image

Humira 0a

Humira 0a
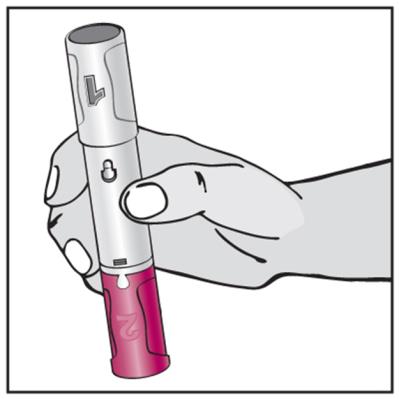
An illustration showing a hand holding a Humira (Adalimumab) pen injector, a component of the Humira KIT. The pen is partially transparent at the bottom, revealing internal parts, with an arrow indicating an action step, likely related to activation or injection.*
FDA Label Image

Humira 0b

Humira 0b
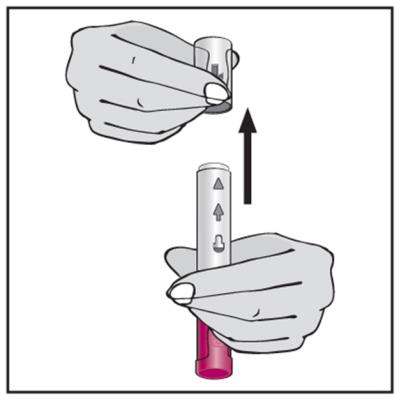
An instructional illustration showing hands removing a cap from a pen-style injector device. The device has a red base and an upward-pointing arrow indicating the direction to remove the cap.*
FDA Label Image

Humira 0c

Humira 0c
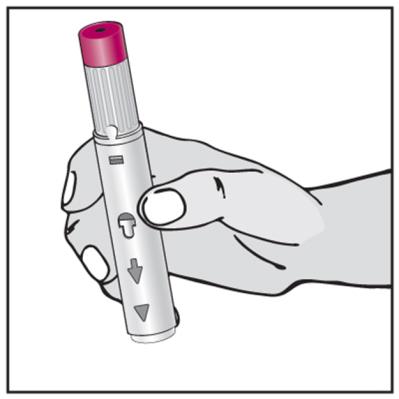
An instructional illustration showing a hand holding a pen-like injection device with a pink cap, featuring arrows and markings on the device body. This image is likely part of usage directions for the HUMIRA Adalimumab kit by A-S Medication Solutions.*
FDA Label Image

Humira 0d

Humira 0d
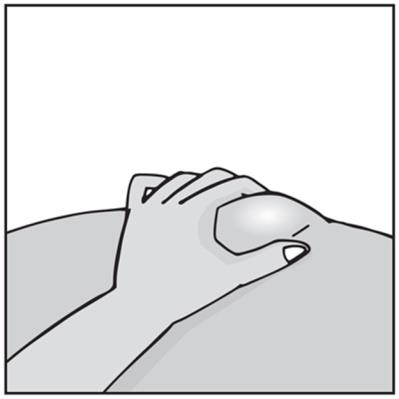
An instructional illustration showing a hand applying pressure or holding a rounded object, possibly a joint, with the thumb positioned on top while the other fingers wrap around from below. The image is in grayscale and appears to demonstrate a step or technique related to physical care or examination.*
FDA Label Image

Humira 0e

Humira 0e
An instructional illustration showing a person holding a syringe device at a 90-degree angle to the thigh. Both hands are shown, one holding the device and the other steadying the injection site on the upper leg. The image likely demonstrates how to properly position the injection for HUMIRA (Adalimumab) kit use.*
FDA Label Image

Humira 0f

Humira 0f
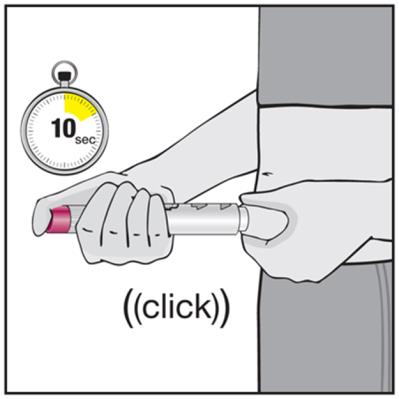
An instructional illustration showing a person administering a subcutaneous injection using a prefilled pen or syringe. The image includes a stopwatch indicating a 10-second wait time and a "click" sound effect, suggesting the injection device activates or completes with an audible click.*
FDA Label Image

Humira 10

Humira 10
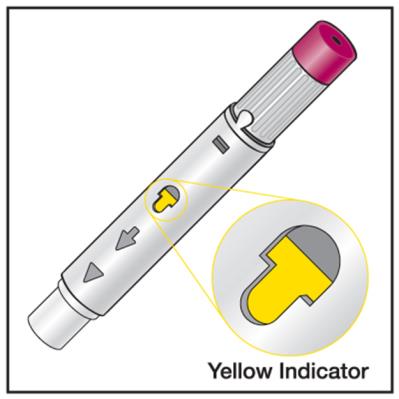
An illustration showing a pen-style device with a red cap and a detailed close-up of the device's yellow indicator. The image highlights the yellow indicator feature on the device, with arrows and a label pointing to it.*
FDA Label Image

Humira 11

Humira 11
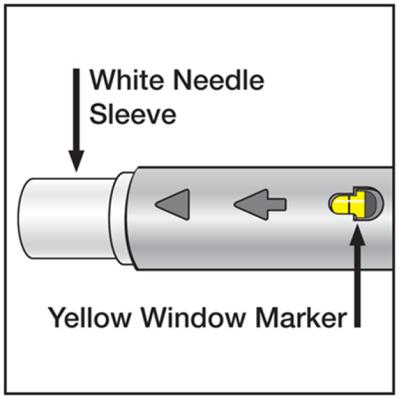
An instructional diagram showing a section of a medical device component with a white needle sleeve and a yellow window marker. Arrows and labels point to these parts, indicating their location on the device, likely part of the HUMIRA kit.*
FDA Label Image

Humira 12

Humira 12
An instructional illustration showing a hand disposing of a syringe or pen device into a sharps container. The image is related to safe disposal practices, likely for a medication kit such as HUMIRA (Adalimumab) Kit.*
FDA Label Image

Humira 13

Humira 13
An illustration diagram of the HUMIRA single-dose pen showing labeled components including a gray cap #1 covering the needle, a white needle sleeve with a white arrow, an inspection window on the pen body, a plum activator button, and a plum-colored cap #2. The diagram visually breaks down the pen into parts for instructional purposes.*
FDA Label Image

Humira 14

Humira 14
Instructional illustration showing Step 1 of a process, depicting a hand reaching towards a kit or box containing multiple items, possibly related to the HUMIRA Adalimumab kit by A-S Medication Solutions.*
FDA Label Image

Humira 15

Humira 15
An instructional illustration labeled "STEP 2" showing a disposal container for sharps, a close-up of a capped syringe needle, and kit components including a prefilled syringe with a red cap, an antiseptic wipe, and a small device or accessory. This step likely demonstrates safe disposal or preparation related to injection.*
FDA Label Image

Humira 16

Humira 16
An instructional illustration labeled 'STEP 3' showing preferred injectable areas for a drug kit. It highlights the abdomen and front thigh regions as suitable injection sites, with arrows indicating specific spots on each area. The image is designed to guide proper administration of the medication.*
FDA Label Image

Humira 17

Humira 17
An illustration showing Step 4 in the use of a medication pen, with a hand holding the pen and a close-up inset highlighting the activation or injection mechanism. The image is part of a step-by-step instructional guide for HUMIRA (Adalimumab) Kit usage.*
FDA Label Image

Humira 18

Humira 18
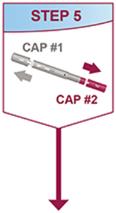
An instructional illustration showing Step 5 of a process involving a kit. It depicts a pen-like device with an arrow pointing to the removal of a cap labeled CAP #1, and another arrow pointing to CAP #2. The illustration is likely part of a multi-step usage guide for the HUMIRA (Adalimumab) kit by A-S Medication Solutions.*
FDA Label Image

Humira 19

Humira 19
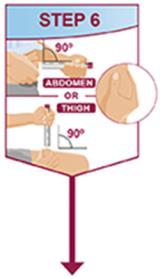
Instructional illustration showing Step 6 for HUMIRA (Adalimumab) KIT administration. It demonstrates proper injection angles of 90 degrees into either the abdomen or thigh, with a visual of the injection site areas highlighted on a simplified human figure.*
FDA Label Image

Humira 1a

Humira 1a
An instructional diagram illustrating Step 7 of a process, showing a hand pressing down on an injection device with a timer indicating 10 seconds and a 'click' sound. A close-up inset highlights an indicator on the device displaying an orange and gray window.*
FDA Label Image

Humira 1b

Humira 1b
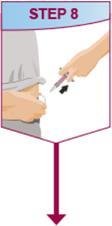
An instructional illustration labeled 'STEP 8' showing a person pulling off a red cap or cover from a syringe or similar device, with a downward arrow indicating the next step.*
FDA Label Image

Humira 1c

Humira 1c
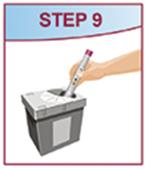
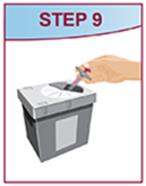
An instructional illustration showing a hand holding a prefilled syringe above a sharps disposal container labeled as Step 9 in a sequence. This image appears to be part of usage or disposal instructions included in a kit for self-administration of medication.*
FDA Label Image

Humira 1d

FDA Label Image

Humira 1e

FDA Label Image

Humira 1f

Humira 1f
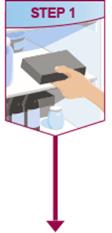
An instructional diagram labeled Step 1 showing a hand reaching to take a gray rectangular item from a refrigerator shelf. The illustration emphasizes the first step in handling or preparing the product.*
FDA Label Image

Humira 20

Humira 20
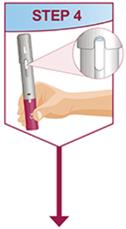
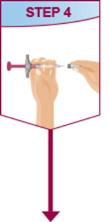
Illustration showing Step 4 in the use of a medication pen device, depicting a hand holding the pen with a close-up inset highlighting part of the device mechanism, likely indicating where to press or check. The illustration includes a red arrow pointing downward, suggesting the next action to be taken.*
FDA Label Image

Humira 21

Humira 21
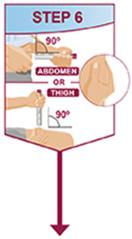
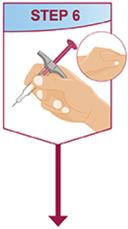
An instructional diagram showing step 6 of an injection process for HUMIRA (adalimumab). It illustrates injecting at a 90-degree angle into the abdomen or thigh, with accompanying directional arrows and a close-up of the injection site.*
FDA Label Image

Humira 22

Humira 22
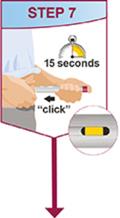
An instructional illustration showing Step 7 of a process, indicating to hold and wait for 15 seconds until a 'click' sound is heard. It shows a close-up of a device window with a yellow indicator, likely confirming correct usage or completion.*
FDA Label Image

Humira 23

FDA Label Image

Humira 24

Humira 24
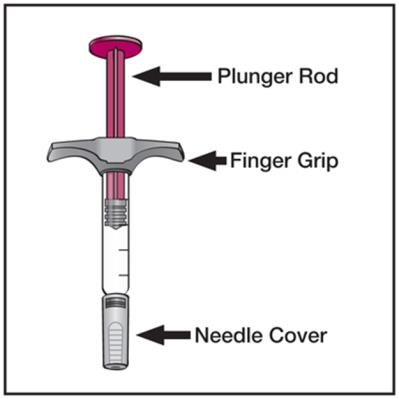
An instructional diagram illustrating the parts of a syringe device, showing a pink plunger rod at the top, a finger grip in the middle, and a needle cover at the bottom.*
FDA Label Image

Humira 25

Humira 25
An illustration showing a hand holding a syringe with a protective cap partially removed, demonstrating the preparation or usage step of the HUMIRA (Adalimumab) KIT.*
FDA Label Image

Humira 26

Humira 26
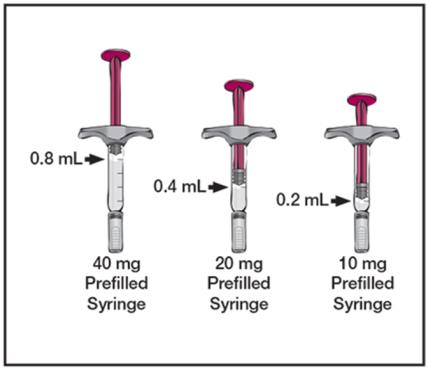
Illustration showing three prefilled syringes of HUMIRA (Adalimumab) in different dosages: 40 mg with 0.8 mL volume, 20 mg with 0.4 mL volume, and 10 mg with 0.2 mL volume. Each syringe features a red plunger and clear barrel with volume markings.*
FDA Label Image

Humira 27

Humira 27
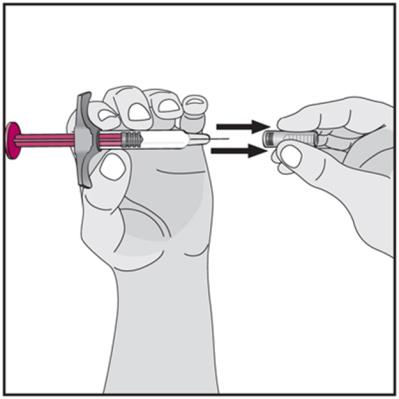
Instructional illustration showing a person holding a syringe in one hand and removing or attaching a small cap or component from the syringe using the other hand. Arrows indicate the direction of motion for the component.*
FDA Label Image

Humira 28

Humira 28
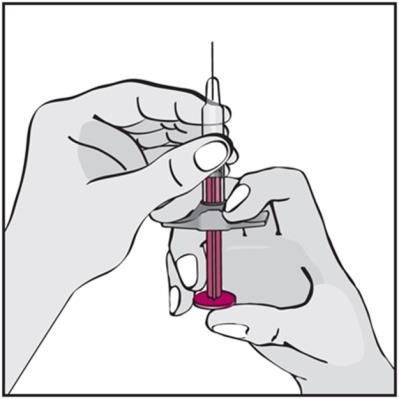
An instructional illustration showing a person's hands preparing a syringe, with one hand holding the syringe body and the other hand adjusting the plunger or cap. The image likely depicts a step in administering or preparing the medication HUMIRA (adalimumab) kit.*
FDA Label Image

Humira 29

Humira 29
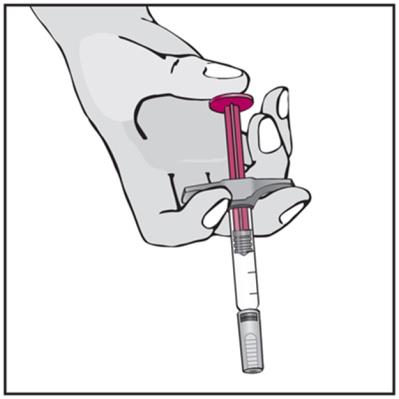
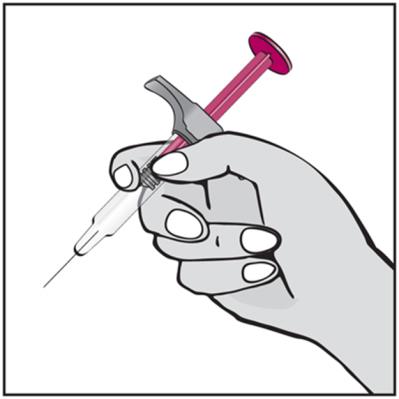
An instructional illustration showing a hand holding a syringe with a needle attached and the plunger partially pressed. The hand grips the syringe by the barrel with the thumb on the plunger, demonstrating the typical positioning for administration.*
FDA Label Image

Humira 2a

Humira 2a
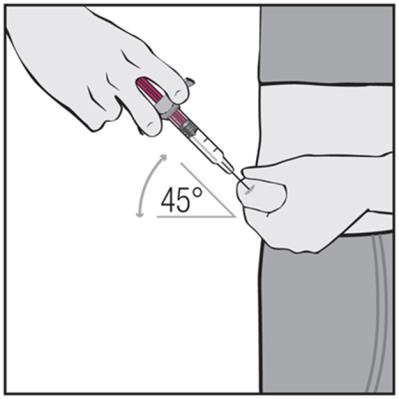
An instructional diagram showing a hand holding a syringe or injector device at a 45-degree angle aimed at the skin of a person's outer thigh area, demonstrating the proper angle for subcutaneous injection.*
FDA Label Image

Humira 2b

Humira 2b
An illustration showing a hand holding a circular pad, positioned near the lower leg or ankle of a person. The image appears instructional, likely demonstrating application of a pad or preparation of the skin area for treatment.*
FDA Label Image

Humira 2c

Humira 2c
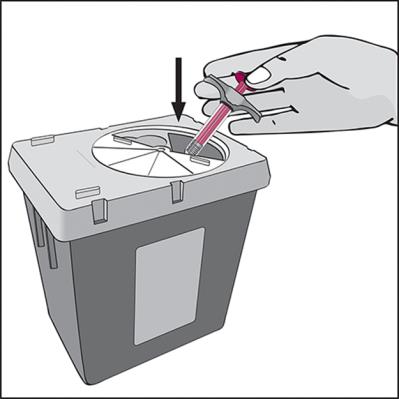
An instructional illustration showing a hand disposing of a needle or syringe into a sharps disposal container. The image depicts the correct way to safely discard the needle by inserting it into the container opening, guided by a downward arrow.*
FDA Label Image

Humira 2d

Humira 2d
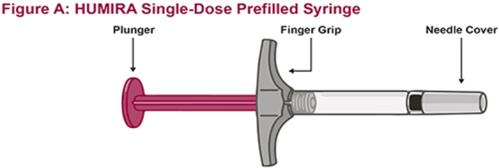
An instructional illustration labeled 'Figure A: HUMIRA Single-Dose Prefilled Syringe' showing the components of the syringe, including the plunger, finger grip, and needle cover, for the HUMIRA (adalimumab) injection kit by A-S Medication Solutions.*
FDA Label Image

Humira 2e

Humira 2e
Instructional illustration labeled 'STEP 2' showing a hand sanitizer dispensing on hands next to a disposal container, a test strip package, and a small metallic item, likely depicting a step in a medication administration or kit usage process.*
FDA Label Image

Humira 2f

Humira 2f
An instructional diagram showing Step 3 for injection site selection, highlighting the injectible areas on a human body silhouette, including front and side views of the abdomen and thighs. The diagram emphasizes where to administer the injection, labeled as 'Injectable Areas.'*
FDA Label Image

Humira 30

Humira 30
An instructional illustration showing Step 4 of a procedure involving injection preparation. It depicts one hand holding a syringe and the other hand adjusting or attaching a component to the syringe, likely part of a medication administration kit.*
FDA Label Image

Humira 31

Humira 31
An instructional illustration labeled Step 5 showing a hand holding a syringe being filled with liquid from a vial. The image is part of a step-by-step guide for preparing an injection.*
FDA Label Image

Humira 32

Humira 32
An instructional diagram labeled as step 6 showing a hand holding a syringe preparing to inject or withdraw medication from a vial. The close-up emphasizes needle placement and injection technique, part of a multi-step medication administration process.*
FDA Label Image

Humira 33

Humira 33
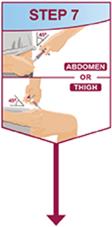
An instructional illustration showing step 7 for an injection process. It depicts a hand methodically positioning a syringe to inject into either the abdomen or thigh area, with the words 'ABDOMEN OR THIGH' highlighted in red. The image uses simple graphics with guiding arrows to emphasize proper injection site placement.*
FDA Label Image

Humira 34

Humira 34
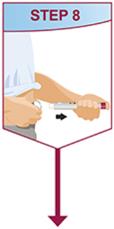
Instructional illustration labeled Step 8 showing a hand holding a small injector device near the abdomen of a person wearing light-colored pants, indicating preparation for an injection as part of a usage guide for HUMIRA (Adalimumab) kit.*
FDA Label Image

Humira 35

Humira 35
An instructional illustration labeled 'STEP 9' showing a hand inserting a used syringe into a sharps disposal container, demonstrating safe disposal of the injection device.*
FDA Label Image

Humira 36

FDA Label Image

Label Image (Lbl500904487)

Label Image (Lbl500904487)
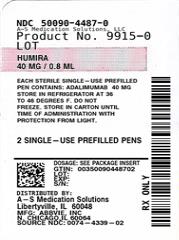
Label for HUMIRA 40 mg/0.8 mL single-use prefilled pen kit by A-S Medication Solutions. The label states contents include two prefilled pens, each with 40 mg adalimumab at 0.8 mL. Storage instructions specify refrigeration at 36 to 46 degrees Fahrenheit with protection from light.*

* About these descriptions: Image descriptions on this page are generated by automated AI analysis of the product label images from the manufacturer's FDA label submission (SPL). They are provided for reference only and may contain errors or omissions. Always rely on the printed label itself and the official FDA labeling, and consult a pharmacist or healthcare professional with any questions about this product.