Bimzelx Injection, Solution
Product Images NDC 50474-781

View Photos of Packaging, Regulatory Labels, and Product Appearance

Product Visual Gallery

This gallery contains 23 technical images submitted to the FDA as part of the official labeling for Bimzelx (NDC 50474-781). Unlike standard consumer photos, these assets often include clinical data figures, molecular chemical structures, and official manufacturer packaging layouts.

As provided by Ucb, Inc., these visuals offer a comprehensive scientific overview of the product's physical and chemical identity, aiding pharmacists and researchers in product verification and study.

FDA Label Image

Figure 1 (Bimzelx 01)
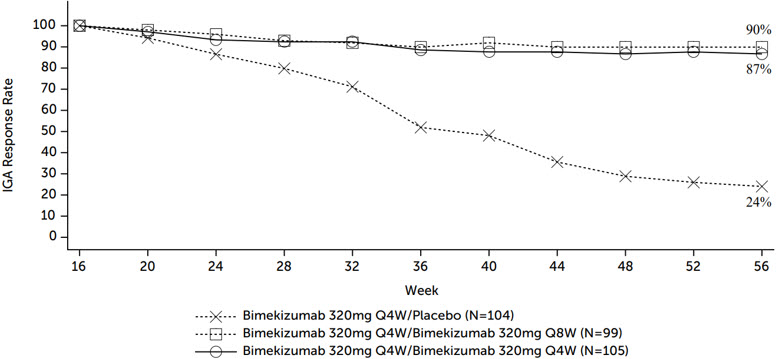
Figure 1 (Bimzelx 01)
A line graph depicting the IGA response rate over a 56-week period by week for three different bimekizumab treatment regimens. The x-axis represents the week number from 16 to 56, and the y-axis shows the IGA response rate percentage from 0 to 100%. Three lines compare bimekizumab 320 mg every 4 weeks with placebo, and two bimekizumab 320 mg dosing schedules (every 8 weeks and every 4 weeks) as follow-up dosing.*
FDA Label Image

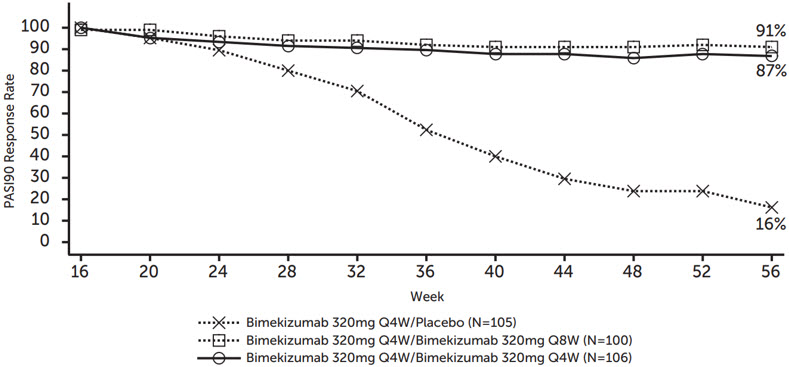
Figure 2 (Bimzelx 02)

Figure 2 (Bimzelx 02)
A line graph depicting PASI90 response rates over 56 weeks for different Bimzelx (bimekizumab) 320 mg dosing regimens. The x-axis represents time in weeks, and the y-axis shows the PASI90 response rate as a percentage. Three lines compare bimekizumab 320 mg every 4 weeks with placebo, every 4 weeks with 320 mg every 8 weeks, and every 4 weeks with 320 mg every 4 weeks, illustrating changes in response rates across the study duration.*
FDA Label Image

Figure A (Bimzelx 03)

Figure A (Bimzelx 03)
An instructional diagram showing components of a Bimzelx (bimekizumab) injection device. The parts labeled include the cap, needle guard, viewing window, and handle, illustrating the assembly and key features of the subcutaneous injection pen.*
FDA Label Image

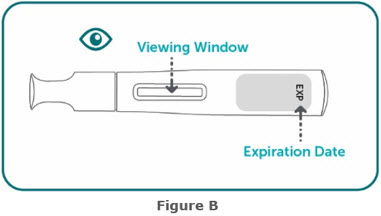
Figure B (Bimzelx 04)

Figure B (Bimzelx 04)
An instructional diagram depicting a prefilled injection device for Bimzelx (bimekizumab). It highlights the viewing window on the barrel and the location of the expiration date on the device.*
FDA Label Image

Figure C (Bimzelx 05)

Figure C (Bimzelx 05)
An instructional illustration depicting a simplified human figure showing recommended injection sites for Bimzelx (bimekizumab) subcutaneous injection. The highlighted areas indicate the abdomen or thigh as injection locations. The caption below reads 'Abdomen or thigh Figure C.'*
FDA Label Image

Figure D (Bimzelx 06)

Figure D (Bimzelx 06)
An instructional diagram illustrating the proper injection site for a subcutaneous injection of Bimzelx. The image shows the back of a person's arm, indicating where the injection should be administered.*
FDA Label Image

Figure E (Bimzelx 07)

Figure E (Bimzelx 07)
An instructional illustration showing a person holding a prefilled injection device with both hands, positioned for subcutaneous administration. The left hand holds the device near the dose window, and the right hand grips the opposite end, indicating preparation or use of the injection device.*
FDA Label Image

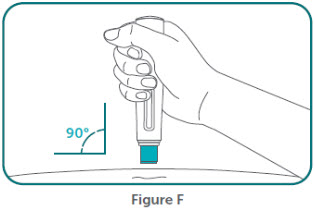
Figure F (Bimzelx 08)

Figure F (Bimzelx 08)
An instructional illustration labeled Figure F showing a hand holding a syringe or injection device at a 90-degree angle to the injection site, demonstrating the proper technique for subcutaneous injection.*
FDA Label Image

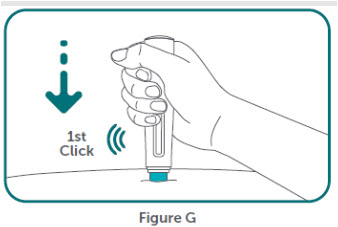
Figure G (Bimzelx 09)

Figure G (Bimzelx 09)
An instructional illustration showing a hand holding an injection pen with an arrow pointing downward, indicating the first click sound when pressing the pen tip to the skin for subcutaneous injection.*
FDA Label Image

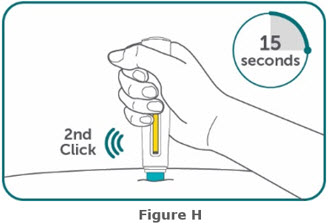
Figure H (Bimzelx 10)

Figure H (Bimzelx 10)
An instructional illustration labeled Figure H showing a hand holding an injector device vertically with a yellow internal indicator. A 15-second timer is displayed in the upper right corner, and the text "2nd Click" indicates an action to be performed during injection.*
FDA Label Image

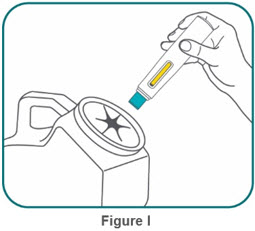
Figure I (Bimzelx 11)

Figure I (Bimzelx 11)
An instructional illustration showing a hand holding a prefilled syringe solution, positioned above the opening of an automated injection device, labeled as Figure 1.*
FDA Label Image

Figure A (Bimzelx 12)

Figure A (Bimzelx 12)
An instructional diagram illustrating the parts of a prefilled syringe for Bimzelx (bimekizumab) injection, solution. Labeled components include the needle cap, needle, syringe barrel, finger grip, plunger rod, and plunger head.*
FDA Label Image

Figure B (Bimzelx 13)

Figure B (Bimzelx 13)
An instructional illustration showing a pre-filled syringe labeled 'EXP' indicating the location of the expiration date on the syringe barrel. The syringe is intended for subcutaneous injection, with a plunger and needle cap depicted in blue and gray colors.*
FDA Label Image

Figure C (Bimzelx 14)

Figure C (Bimzelx 14)
An instructional illustration showing the recommended subcutaneous injection sites for the medication Bimzelx (bimekizumab). The image highlights the abdomen and thighs as suitable areas for injection administration, labeled as Figure C.*
FDA Label Image

Figure D (Bimzelx 15)

Figure D (Bimzelx 15)
An instructional diagram showing the back of a person's arm, indicating the injection site for subcutaneous administration. The figure is labeled 'Back of arm' and illustrates the recommended injection location for Bimzelx (bimekizumab) injection solution.*
FDA Label Image

Figure E (Bimzelx 16)

Figure E (Bimzelx 16)
An instructional illustration labeled Figure E showing two hands preparing an injection. One hand holds a syringe with a needle, while the other hand is removing a protective cap from the needle in preparation for subcutaneous injection.*
FDA Label Image

Figure F (Bimzelx 17)

Figure F (Bimzelx 17)
An instructional illustration showing how to inject the Bimzelx subcutaneous injection at a 45-degree angle into the abdomen. The image depicts a person holding the syringe and injecting the medication into the skin.*
FDA Label Image

Figure G (Bimzelx 18)

Figure G (Bimzelx 18)
An instructional illustration showing a hand holding a syringe for subcutaneous injection. The syringe is positioned to inject into the skin, with an arrow indicating the direction of needle insertion.*
FDA Label Image

Figure H (Bimzelx 19)

Figure H (Bimzelx 19)
An instructional illustration showing a hand holding a syringe for subcutaneous injection. The syringe is inserted at an angle into the skin, with a check mark indicating correct injection technique.*
FDA Label Image

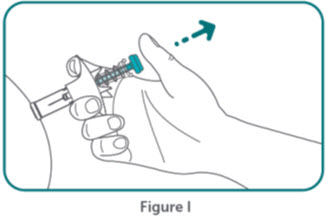
Figure I (Bimzelx 20)

Figure I (Bimzelx 20)
An instructional illustration showing the use of a pre-filled syringe for subcutaneous injection. It depicts a hand holding the syringe while the other hand is positioned to receive the injection, indicating the injection technique for a medication like Bimzelx (bimekizumab) injection.*
FDA Label Image

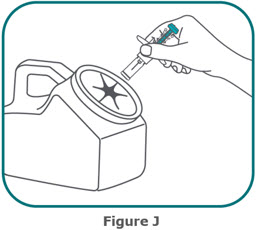
Figure J (Bimzelx 21)

Figure J (Bimzelx 21)
An instructional illustration showing a hand holding a syringe labeled Bimzelx, preparing to inject the solution into a device or container with a circular opening, possibly for disposal or further handling of the injection material.*
FDA Label Image

Principal Display Panel (160 mg/mL Autoinjector Carton)

Principal Display Panel (160 mg/mL Autoinjector Carton)
Bimzelx (bimekizumab-bkzx) Injection 160 mg/mL per autoinjector subcutaneous injection label. The packaging contains two single-dose autoinjectors, each delivering 160 mg in 1 mL. The label includes preparation and injection instructions, storage conditions, and manufacturer details (UCB, Inc.). The product is labeled for prescription use only.*
FDA Label Image

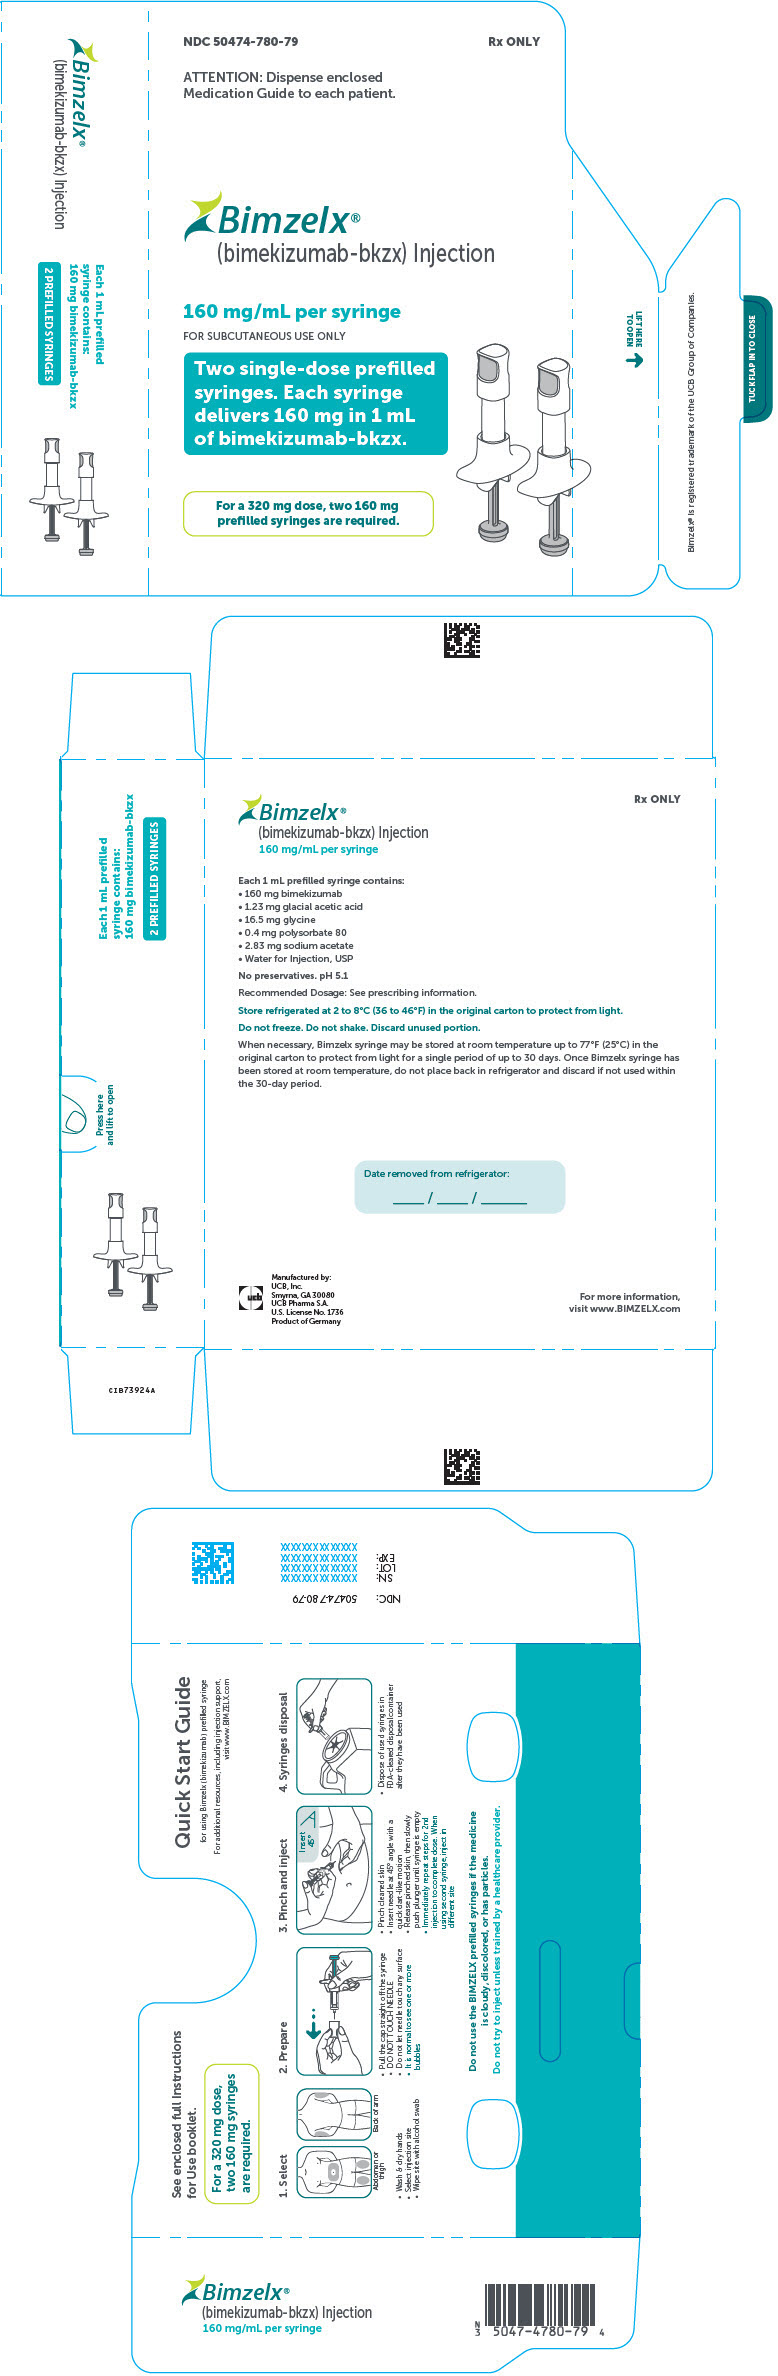
Principal Display Panel (160 mg/mL Syringe Carton)

Principal Display Panel (160 mg/mL Syringe Carton)
Bimzelx (bimekizumab-bkzx) Injection 160 mg/mL prefilled syringes packaging label for subcutaneous injection. The label states two single-dose prefilled syringes each delivering 160 mg in 1 mL are included. The labeler is UCB, Inc. It includes storage instructions to refrigerate between 2 to 8°C and warnings not to freeze or shake. A quick start guide with syringe preparation and injection steps is illustrated on the label.*

* About these descriptions: Image descriptions on this page are generated by automated AI analysis of the product label images from the manufacturer's FDA label submission (SPL). They are provided for reference only and may contain errors or omissions. Always rely on the printed label itself and the official FDA labeling, and consult a pharmacist or healthcare professional with any questions about this product.