Adzynma Kit
Product Images NDC 64764-140

View Photos of Packaging, Regulatory Labels, and Product Appearance

Product Visual Gallery

This gallery contains 30 technical images submitted to the FDA as part of the official labeling for Adzynma (NDC 64764-140). Unlike standard consumer photos, these assets often include clinical data figures, molecular chemical structures, and official manufacturer packaging layouts.

As provided by Takeda Pharmaceuticals America, Inc., these visuals offer a comprehensive scientific overview of the product's physical and chemical identity, aiding pharmacists and researchers in product verification and study.

FDA Label Image

Figure A (Adzynma 01)
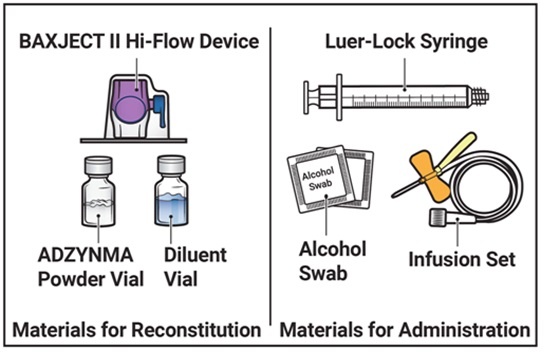
Figure A (Adzynma 01)
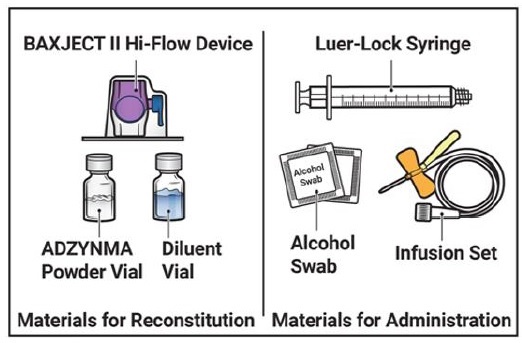
An instructional illustration showing components of the ADZYNMA kit for reconstitution and administration. It depicts a BAXJECT II Hi-Flow Device, ADZYNMA powder vial, diluent vial for reconstitution, and materials for administration including a Luer-Lock syringe, alcohol swab, and infusion set.*
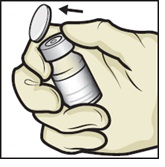
FDA Label Image

Figure B (Adzynma 02)

Figure B (Adzynma 02)
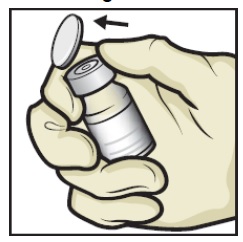
An instructional illustration showing a hand holding a vial with a peel-off cap partially removed, indicated by an arrow. The image suggests how to peel back the vial's cap before use.*
FDA Label Image

Figure C (Adzynma 03)

Figure C (Adzynma 03)
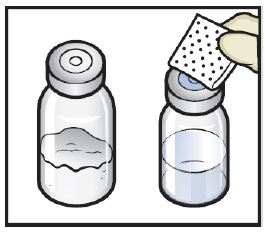
An instructional illustration showing two medical vials side by side. The vial on the right has a partially removed protective stopper, held by a hand, revealing the vial opening. The vial on the left remains sealed with its stopper intact.*
FDA Label Image

Figure D (Adzynma 04)

Figure D (Adzynma 04)
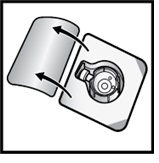
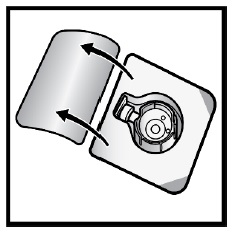
An instructional illustration showing the opening of a circular component inside a rectangular frame, with arrows indicating the motion to peel back a cover. This diagram likely demonstrates how to access or prepare a part of the ADZYNMA kit by Takeda Pharmaceuticals America, Inc.*
FDA Label Image

Figure E (Adzynma 05)

Figure E (Adzynma 05)
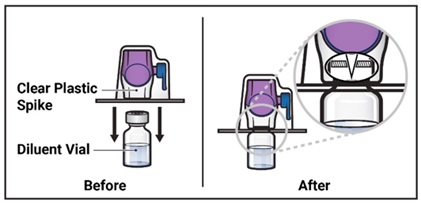
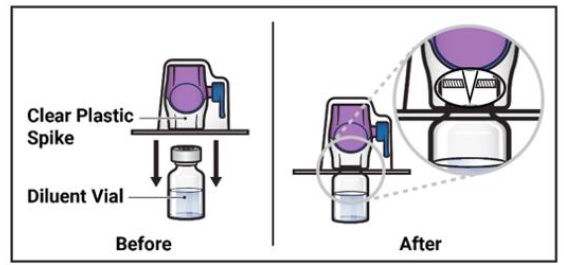
An instructional illustration showing the connection of a clear plastic spike to a diluent vial before and after assembly, highlighting the proper attachment procedure for preparing the ADZYNMA kit containing Apadamtase Alfa.*
FDA Label Image

Figure F (Adzynma 06)

Figure F (Adzynma 06)
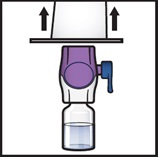
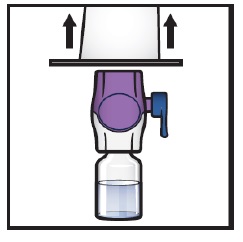
An instructional diagram showing a vial with a purple cap and a blue valve or stopper. The vial is oriented upside down beneath a horizontal platform, with two upward-pointing arrows above the platform indicating lifting or removal direction.*
FDA Label Image

Figure G (Adzynma 07)

Figure G (Adzynma 07)
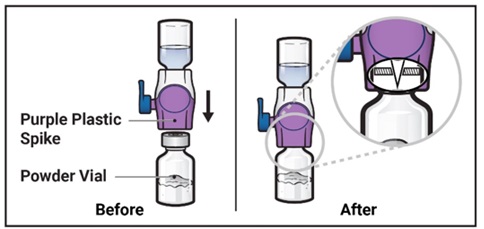
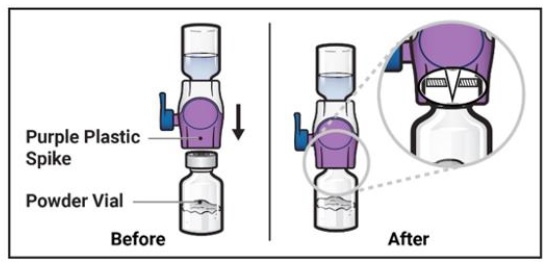
Illustration showing a step in the preparation of ADZYNMA kit involving a purple plastic spike used to connect a powder vial to a solution container. The image displays the vial before and after connection, highlighting how the spike attaches through the vial's top.*
FDA Label Image

Figure H (Adzynma 08)

Figure H (Adzynma 08)
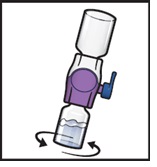
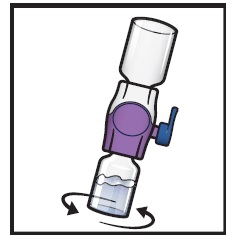
An instructional illustration showing a step of handling or assembling a component of the ADZYNMA (Apadamtase Alfa) KIT. The diagram depicts two parts connected and arrows indicating rotation or twisting motion likely required during preparation or use.*
FDA Label Image

Figure I (Adzynma 09)

Figure I (Adzynma 09)
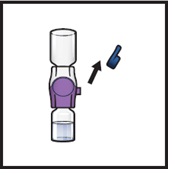
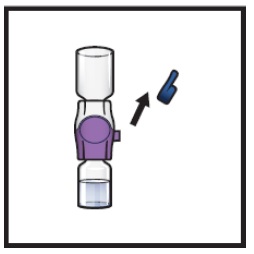
An instructional illustration depicting a step in the preparation or use of the ADZYNMA (Apadamtase Alfa) kit, showing a vial with a purple clamp or valve and an arrow pointing to the attachment of a blue cap or component.*
FDA Label Image

Figure J (Adzynma 10)

Figure J (Adzynma 10)
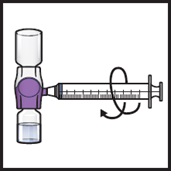
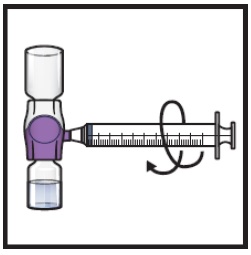
An instructional illustration showing a syringe connected to a vial or adapter with a twist motion indicated by a curved arrow. It depicts the process of attaching or securing the syringe to the vial or adapter, likely as part of drug preparation steps for ADZYNMA (Apadamtase Alfa) kit by Takeda Pharmaceuticals America, Inc.*
FDA Label Image

Figure K (Adzynma 11)

Figure K (Adzynma 11)
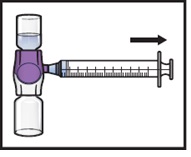
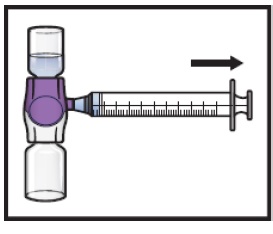
An instructional illustration showing a syringe inserted into a valve or port, with an arrow pointing to the right indicating the direction of fluid flow or injection. The image is related to the use or administration of the ADZYNMA Apadamtase Alfa kit by Takeda Pharmaceuticals America, Inc.*
FDA Label Image

Figure L (Adzynma 12)

Figure L (Adzynma 12)
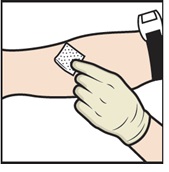
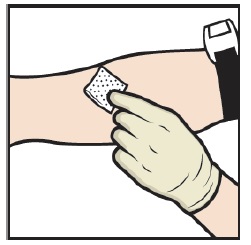
An instructional illustration showing a gloved hand applying an adhesive patch or bandage to the inner forearm of a person secured with a tourniquet, likely demonstrating site preparation or application procedure related to medication administration.*
FDA Label Image

Figure M (Adzynma 13)

Figure M (Adzynma 13)
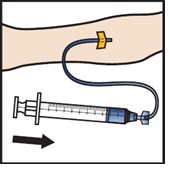
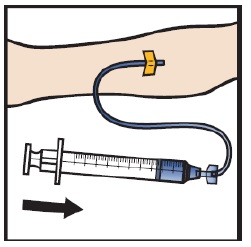
An instructional illustration showing a syringe connected to an intravenous (IV) line inserted into a patient's arm. An arrow points left, indicating the direction for administering or withdrawing fluid through the IV setup.*
FDA Label Image

Figure Baxject (Adzynma 14)

Figure Baxject (Adzynma 14)
ADZYNMA kit by Takeda Pharmaceuticals America, Inc. The label displays the proprietary name ADZYNMA with the generic name Apadamtase Alfa beneath it. The kit packaging is designed for human prescription use, showing the labeler prominently, but no specific dosage strength or quantity is visible.*
FDA Label Image

Figure Takeda (Adzynma 15)

FDA Label Image

Figure A (Adzynma 16)

Figure A (Adzynma 16)
Illustration depicting components of the ADZYNMA kit by TAKEDA PHARMACEUTICALS AMERICA, INC. It shows materials for reconstitution, including a BAXJECT II Hi-Flow Device, ADZYNMA powder vial, and diluent vial, alongside materials for administration such as a luer-lock syringe, alcohol swab, and infusion set.*
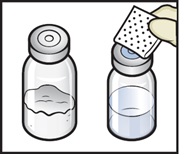
FDA Label Image

Figure B (Adzynma 17)

Figure B (Adzynma 17)
Illustration showing a hand holding a vial, demonstrating removal of the vial stopper cover by lifting it upwards. The image is likely part of instructions for preparing or handling the medication ADZYNMA (Apadamtase Alfa) kit from Takeda Pharmaceuticals America, Inc.*
FDA Label Image

Figure C (Adzynma 18)

Figure C (Adzynma 18)
An illustration showing two medical vials. The vial on the left contains powder, visible inside the container. The vial on the right is being opened by peeling back a paper or foil seal, revealing a clear liquid inside. Both vials have rubber stoppers on top.*
FDA Label Image

Figure D (Adzynma 19)

Figure D (Adzynma 19)
An instructional diagram showing the opening of a blister pack flap to reveal a circular medication well inside. The arrows indicate the direction to lift the flap away from the well for access.*
FDA Label Image

Figure E (Adzynma 20)

Figure E (Adzynma 20)
An instructional diagram showing the use of a clear plastic spike inserted into a diluent vial. The left side is labeled "Before" and shows the spike positioned above the vial. The right side, labeled "After," shows the spike fully inserted into the vial with a close-up of the spike's tip engaging the vial stopper.*
FDA Label Image

Figure F (Adzynma 21)

Figure F (Adzynma 21)
An instructional illustration showing a hand-operated valve or stopper mechanism. It depicts two upward arrows indicating the direction to pull or lift a rectangular component from above a purple and white valve attached to a clear container.*
FDA Label Image

Figure G (Adzynma 22)

Figure G (Adzynma 22)
Illustration showing the assembly of ADZYNMA kit components with a purple plastic spike connecting a diluent vial above to a powder vial below, demonstrating the setup before and after the connection.*
FDA Label Image

Figure H (Adzynma 23)

Figure H (Adzynma 23)
An instructional diagram showing a two-part container with arrows indicating a twisting motion at the base. The illustration appears to demonstrate how to mix or activate components within the container, featuring a purple central section and a blue lever or latch on the side.*
FDA Label Image

Figure I (Adzynma 24)

Figure I (Adzynma 24)
Illustration showing a medical device component with a blue piece being removed or attached, indicated by an arrow pointing upwards from the device. The device appears to include a clear top section and a purple clip or mechanism in the middle.*
FDA Label Image

Figure J (Adzynma 25)

Figure J (Adzynma 25)
An instructional diagram showing how to attach and rotate a syringe connected to a vial or container, likely demonstrating a step for preparing or mixing the medication ADZYNMA (Apadamtase Alfa) Kit.*
FDA Label Image

Figure K (Adzynma 26)

Figure K (Adzynma 26)
An instructional diagram showing a purple three-way valve system with two connected vials and a syringe attached to the side. An arrow pointing right indicates the direction to push the syringe plunger to transfer liquid from one vial through the valve.*
FDA Label Image

Figure L (Adzynma 27)

Figure L (Adzynma 27)
An illustration showing a gloved hand applying an alcohol swab to a forearm with a tourniquet in place, demonstrating the preparation of the skin before an injection or blood draw.*
FDA Label Image

Figure M (Adzynma 28)

Figure M (Adzynma 28)
An instructional illustration showing a syringe connected to an intravenous line inserted in a forearm vein, indicating the direction of fluid flow with an arrow. The image demonstrates intravenous administration technique for a drug kit.*
FDA Label Image

Principal Display Panel (500 IU Kit Carton)

Principal Display Panel (500 IU Kit Carton)
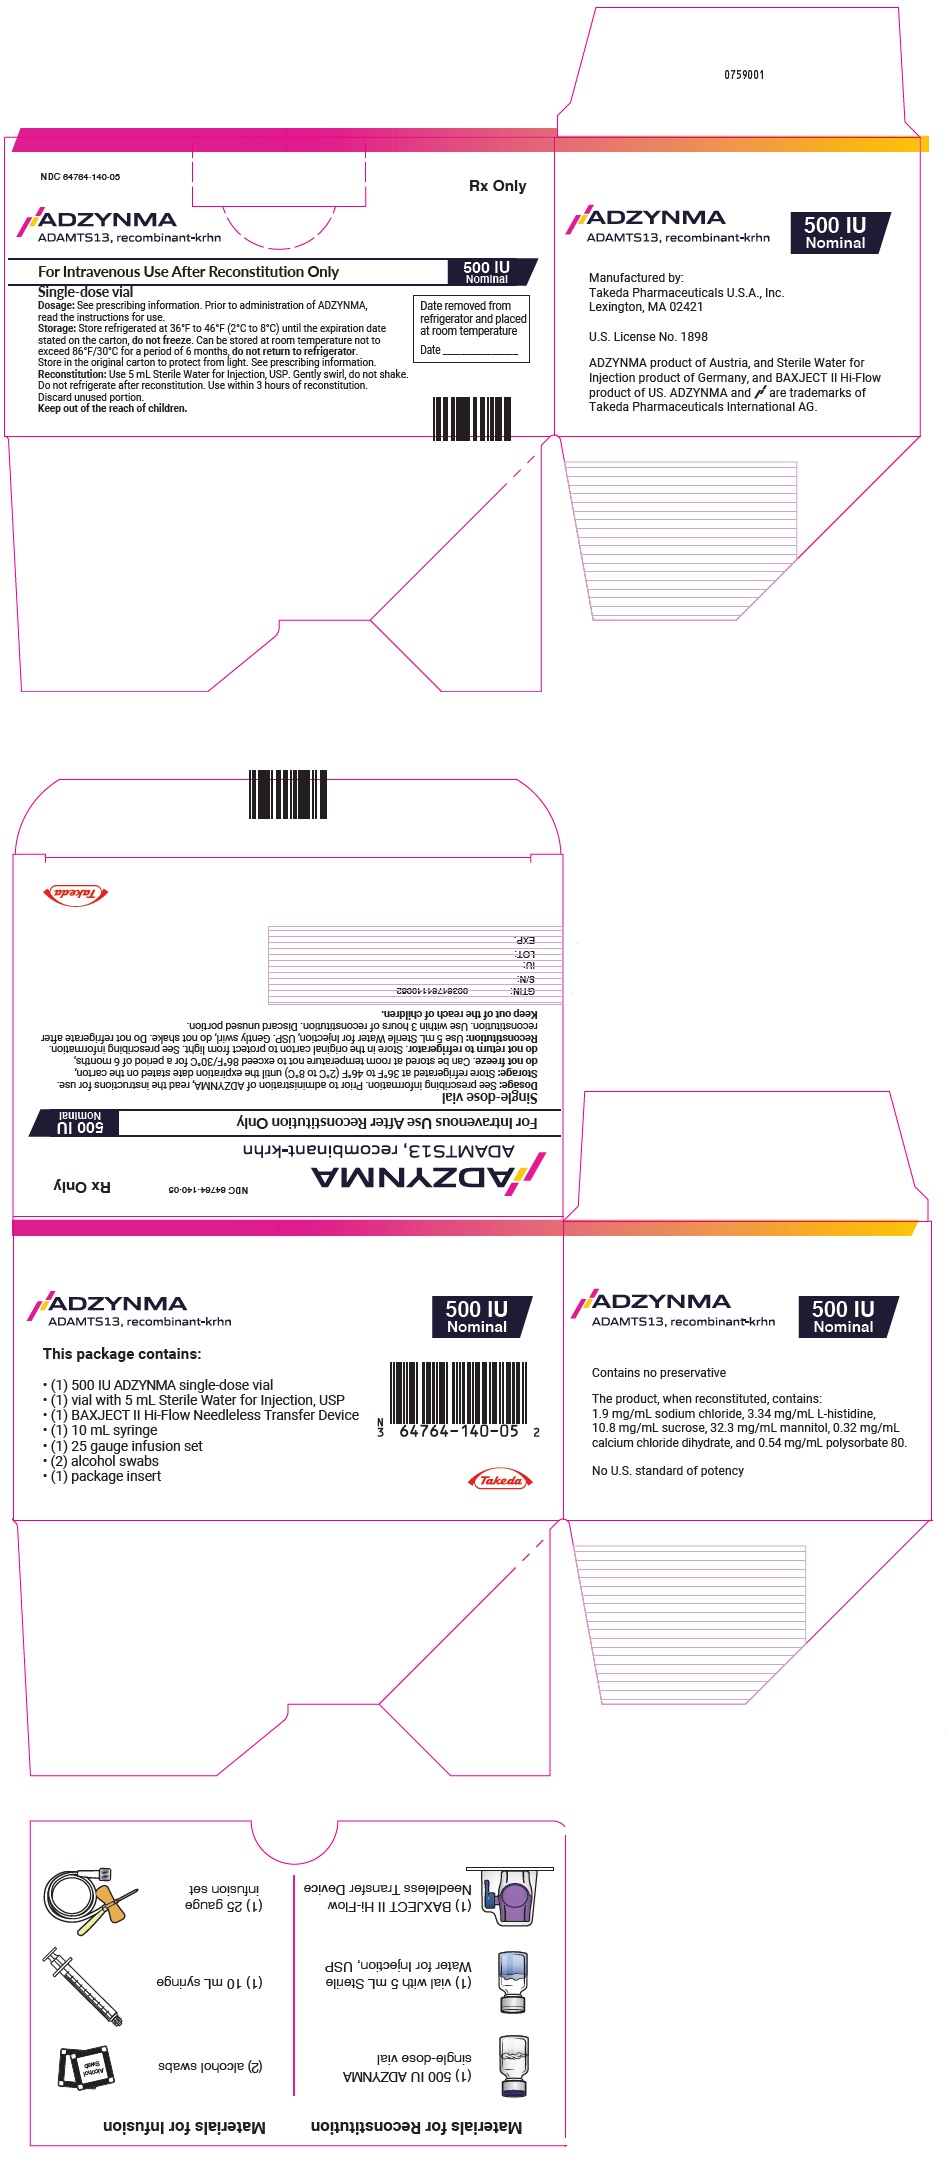
ADZYNMA kit packaging label for intravenous use after reconstitution containing Apadamtase Alfa (ADAMTS13, recombinant-krhn) with a nominal strength of 500 IU. The label includes dosing and storage instructions, manufacturer information Takeda Pharmaceuticals U.S.A., Inc., package contents listing (single-dose vial, sterile water vial, needleless transfer device, syringe, infusion set, alcohol swabs, and package insert), and product trademarks. The label also details the reconstituted product's components and cautions on use and storage conditions.*
FDA Label Image

Principal Display Panel (1500 IU Kit Carton)

Principal Display Panel (1500 IU Kit Carton)
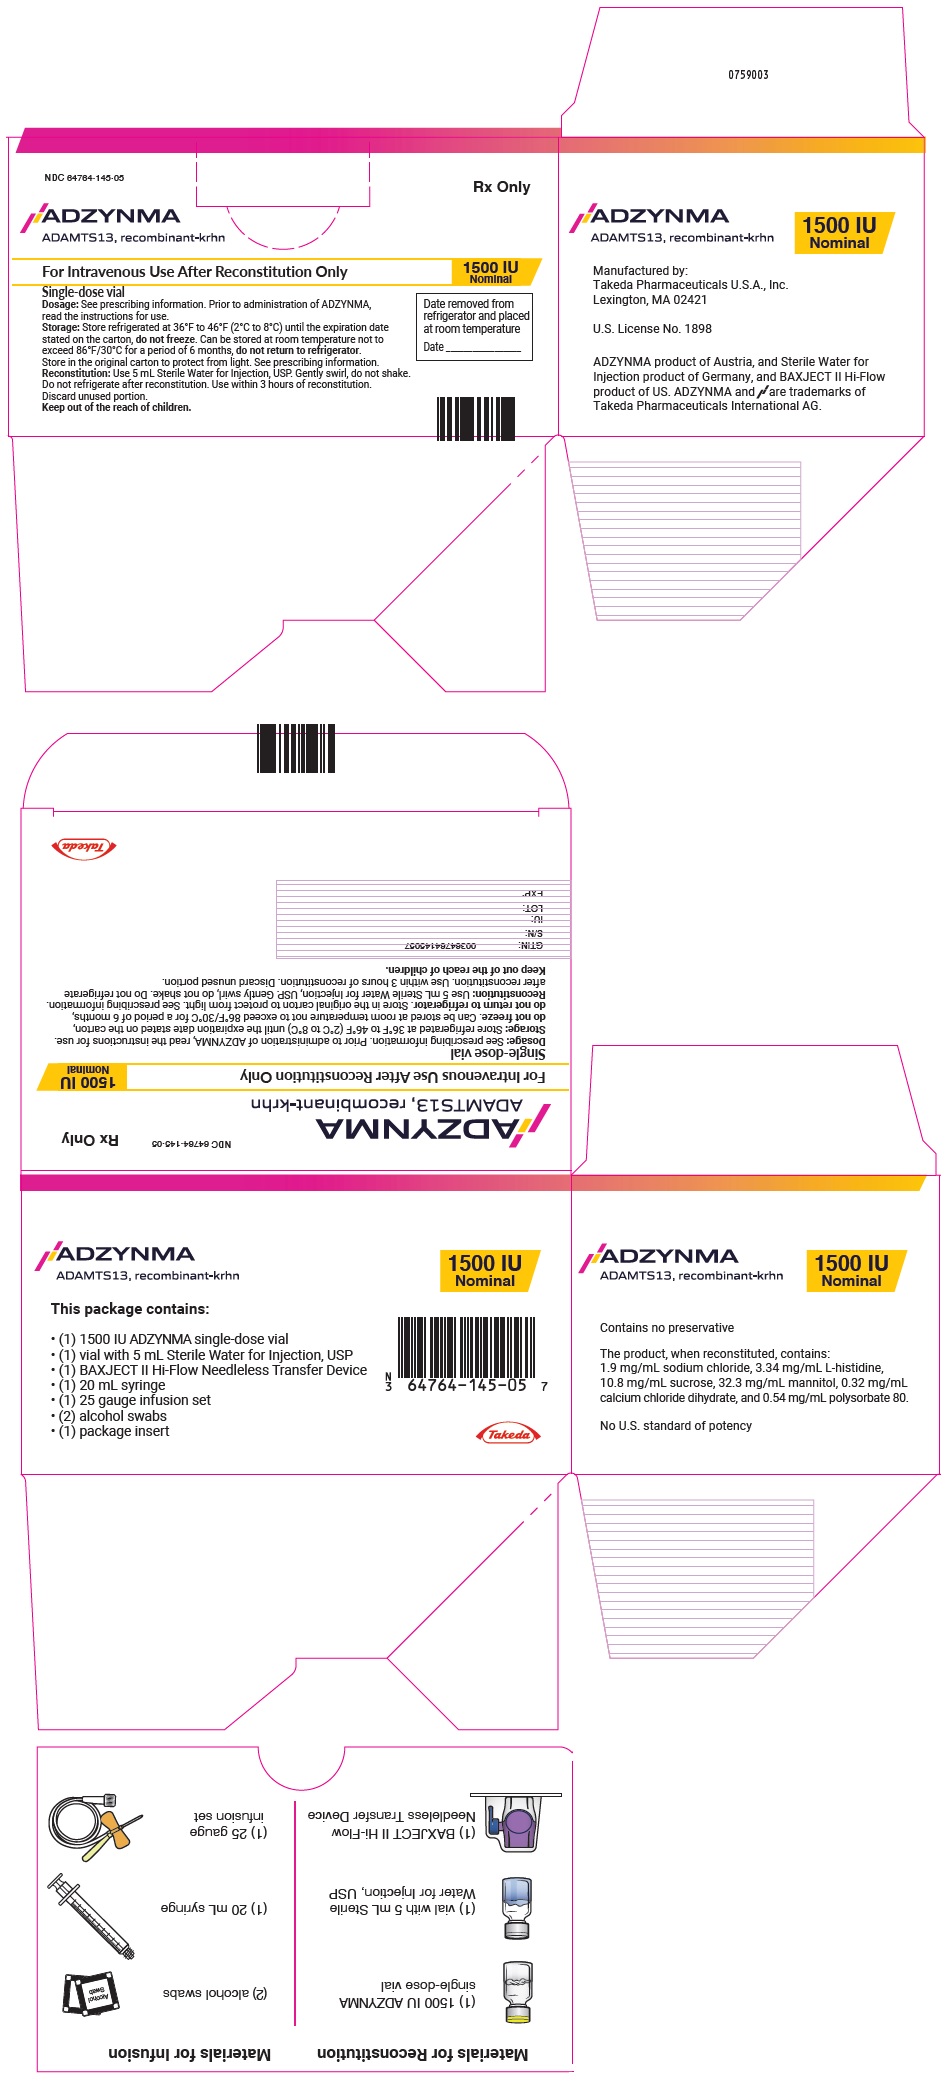
Packaging label for ADZYNMA kit containing Apadamtase Alfa, presented as a single-dose vial with a nominal strength of 1500 IU. The label includes storage and handling instructions, manufacturer information (Takeda Pharmaceuticals U.S.A., Inc.), and a list of included materials such as a sterile water vial, needleless transfer device, syringe, infusion set, alcohol swabs, and package insert. The design uses mainly white background with magenta and yellow highlights.*

* About these descriptions: Image descriptions on this page are generated by automated AI analysis of the product label images from the manufacturer's FDA label submission (SPL). They are provided for reference only and may contain errors or omissions. Always rely on the printed label itself and the official FDA labeling, and consult a pharmacist or healthcare professional with any questions about this product.