Atzumi Powder
Product Images NDC 76978-101

View Photos of Packaging, Regulatory Labels, and Product Appearance

Product Visual Gallery

This gallery contains 23 technical images submitted to the FDA as part of the official labeling for Atzumi (NDC 76978-101). Unlike standard consumer photos, these assets often include clinical data figures, molecular chemical structures, and official manufacturer packaging layouts.

As provided by Satsuma Pharmaceuticals, Inc., these visuals offer a comprehensive scientific overview of the product's physical and chemical identity, aiding pharmacists and researchers in product verification and study.

FDA Label Image

Chemical Structure (Atzumi 01)

Chemical Structure (Atzumi 01)
Chemical structure of dihydroergotamine mesylate, the active ingredient in ATZUMI nasal powder. The diagram shows the molecular arrangement including rings and functional groups characteristic of dihydroergotamine mesylate.*
FDA Label Image

Figure (Atzumi 02)

Figure (Atzumi 02)
A line graph comparing the estimated probability of response to study medication over time between Dihydroergotamine Mesylate and placebo groups in studies with 208 and 200 participants, respectively. The graph shows higher response probabilities for Dihydroergotamine Mesylate than placebo from 0 to 4 hours after the first dose.*
FDA Label Image

Figure (Atzumi 03)

Figure (Atzumi 03)
A line graph comparing the estimated probability of response to study medication over time (0 to 4 hours after first dose) between Dihydroergotamine Mesylate and placebo from clinical studies. The Dihydroergotamine Mesylate group shows a higher response probability over time compared to placebo.*
FDA Label Image

Figure (Atzumi 04)

Figure (Atzumi 04)
A line graph showing the estimated probability of analgesic use over 24 hours after first spray for Dihydroergotamine Mesylate (N=305) versus Placebo (N=300). The x-axis represents hours after first spray (0 to 24), and the y-axis represents estimated probability of analgesic use (0% to 100%). The Placebo curve rises sharply and plateaus near 70%, while the Dihydroergotamine Mesylate curve rises more gradually and plateaus near 45%.*
FDA Label Image

Image (Atzumi 05)

Image (Atzumi 05)
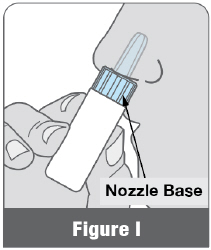
An instructional diagram of the ATZUMI nasal powder device showing labeled parts: clear cap, round blue tab, blue nozzle, powdered medicine inside the nozzle, nozzle base, expiration date on the body, and white air pump. The image visually identifies components for proper use of the nasal powder drug delivery system.*
FDA Label Image

Image (Atzumi 06)

Image (Atzumi 06)
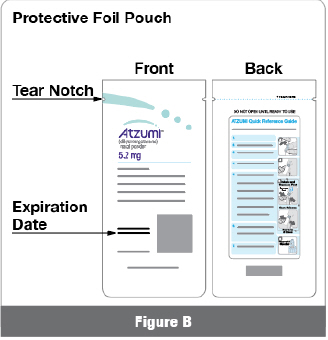
Illustrative diagram showing the front and back views of the ATZUMI protective foil pouch packaging for the 5.2 mg nasal powder. The front side highlights key features including a tear notch and expiration date area. The back side includes an instruction panel titled 'ATZUMI Quick Reference Guide' with stepwise usage illustrations.*
FDA Label Image

Image (Atzumi 07)

Image (Atzumi 07)
The packaging label of Atzumi (dihydroergotamine mesylate) 5.2 mg nasal powder is shown. The label includes the product name, strength, and a storage instruction to keep the product in its protective foil pouch until ready to use. The label is primarily white with blue and black text.*
FDA Label Image

Image (Atzumi 08)

Image (Atzumi 08)
An instructional illustration labeled Figure D showing a person holding a tissue or cloth over their nose, likely demonstrating a step in nasal administration or hygiene for a nasal powder product.*
FDA Label Image

Image (Atzumi 09)

Image (Atzumi 09)
An instructional illustration labeled Figure E showing a person removing a small unit-dose nasal powder device from a rectangular sleeve or pouch by pulling it upward. The device appears to be designed for nasal administration of a powdered drug dose.*
FDA Label Image

Image (Atzumi 10)

Image (Atzumi 10)
An instructional diagram depicting a human eye with an arrow pointing to a nasal spray device, illustrating the correct direction or method of nasal spray administration for the drug powder form.*
FDA Label Image

Image (Atzumi 11)

Image (Atzumi 11)
Instructional illustration labeled Figure G showing a hand holding a nasal powder applicator and pulling the cap upward away from the device, indicated by an upward-pointing arrow, demonstrating how to remove the cap before use.*
FDA Label Image

Image (Atzumi 12)

Image (Atzumi 12)
An instructional illustration showing how to open the nasal spray nozzle of ATZUMI powder by holding the nozzle base and removing the cap with the other hand. The image emphasizes correct handling for administration preparation.*
FDA Label Image

Image (Atzumi 13)

Image (Atzumi 13)
Illustration showing how to hold the ATZUMI nasal powder device by the nozzle base with a hand, indicating a step in its usage process, labeled as Figure 1.*
FDA Label Image

Image (Atzumi 14)

Image (Atzumi 14)
An instructional diagram illustrating the nasal administration of ATZUMI nasal powder. It shows three steps labeled First Squeeze, Second Squeeze, and Third Squeeze, each with images demonstrating inhaling through the nose while squeezing the white air pump quickly, followed by releasing it. Arrows indicate the squeezing and releasing motions along with airflow inhalation through the nostril.*
FDA Label Image

Image (Atzumi 15)

Image (Atzumi 15)
The image shows a partial text panel containing the phrase "Continue to Step 3." It appears to be part of instructions or directions but does not provide complete dosing or usage information for the drug.*
FDA Label Image

Image (Atzumi 16)

Image (Atzumi 16)
An instructional illustration for ATZUMI nasal powder showing a close-up of a nostril and the device's nozzle with a cap removed. The text instructs to deliver any remaining loose powdered medicine into the same nostril after initial administration.*
FDA Label Image

Image (Atzumi 17)

Image (Atzumi 17)
An instructional illustration labeled 'Figure L' showing the disposal of a nasal spray device and a small item, possibly a cap or tablet, into a waste bin. This likely demonstrates proper disposal of packaging or components related to the medication.*
FDA Label Image

Image (Atzumi 18)

Image (Atzumi 18)
An instructional illustration showing a hand positioning a device upright while another hand is dropping powder into the device’s top opening. This image is likely part of usage directions for ATZUMI nasal powder by Satsuma Pharmaceuticals.*
FDA Label Image

Image (Atzumi 19)

Image (Atzumi 19)
An instructional illustration showing a person holding a nasal spray device near their nostril, demonstrating the proper way to use the nasal spray by aiming it into the nose.*
FDA Label Image

Image (Atzumi 20)

Image (Atzumi 20)
Instructional diagram showing step 5 of using the ATZUMI nasal powder device. It illustrates to inhale while squeezing the device fast, then release, and perform this action three times, with directional arrows guiding the user through the process.*
FDA Label Image

Image (Atzumi 21)

Image (Atzumi 21)
Illustration showing step 6 of a usage instruction indicating to "Repeat if Needed". The image depicts a close-up of a nasal spray tip or nozzle inserted into a container or device, with small particles or droplets visible inside the nozzle section.*
FDA Label Image

Principal Display Panel (5.2 mg Bottle Carton)

Principal Display Panel (5.2 mg Bottle Carton)
Packaging label for Atzumi nasal powder, containing 5.2 mg dihydroergotamine mesylate per dose. The label shows the brand name Atzumi prominently with the active ingredient and strength noted. It includes storage instructions, usage notes, quantity details with eight prefilled single-dose devices, manufacturer information (Satsuma Pharmaceuticals, Inc.), and NDC 76978-101-08. The design features a teal swoosh graphic and the Satsuma Pharmaceuticals logo.*
FDA Label Image

Principal Display Panel (5.2 mg Device Pouch Label)

Principal Display Panel (5.2 mg Device Pouch Label)
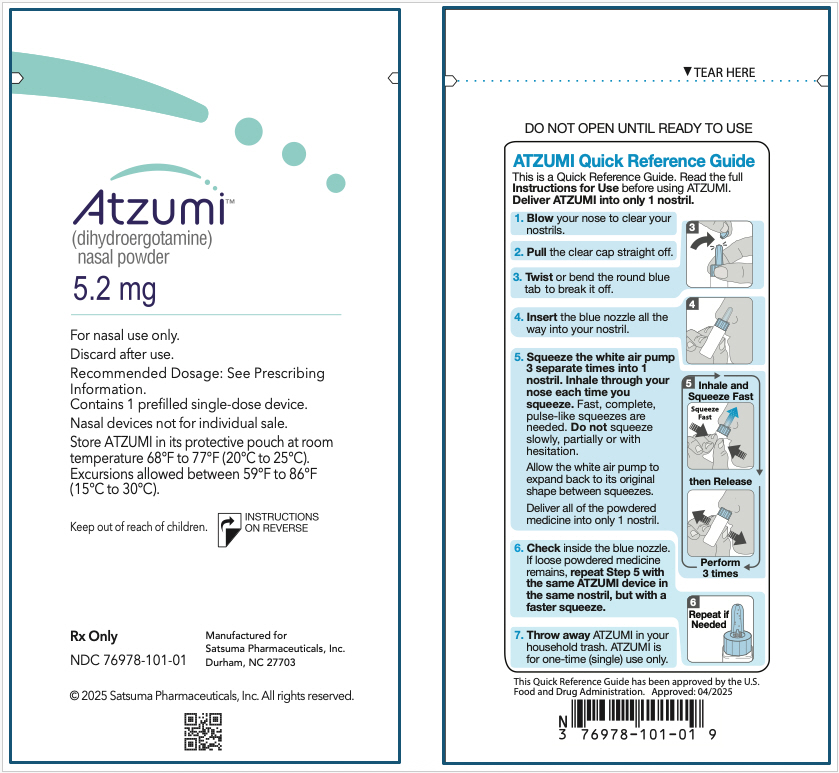
Atzumi 5.2 mg nasal powder label showing proprietary name, generic name dihydroergotamine, and instructions for nasal use only. Contains 1 prefilled single-dose device with storage conditions and manufacturer Satsuma Pharmaceuticals, Inc. Also includes a quick reference guide for use with step-by-step illustrated instructions for delivery through one nostril.*

* About these descriptions: Image descriptions on this page are generated by automated AI analysis of the product label images from the manufacturer's FDA label submission (SPL). They are provided for reference only and may contain errors or omissions. Always rely on the printed label itself and the official FDA labeling, and consult a pharmacist or healthcare professional with any questions about this product.