Insulin Diluting Medium For Kirsty Injection, Solution
Product Images NDC 83257-006

View Photos of Packaging, Regulatory Labels, and Product Appearance

Product Visual Gallery

This gallery contains 33 technical images submitted to the FDA as part of the official labeling for Insulin Diluting Medium For Kirsty (NDC 83257-006). Unlike standard consumer photos, these assets often include clinical data figures, molecular chemical structures, and official manufacturer packaging layouts.

As provided by Biocon Biologics Inc., these visuals offer a comprehensive scientific overview of the product's physical and chemical identity, aiding pharmacists and researchers in product verification and study.

Product Images & Figures Index

FDA Label Image

Figure 1. Structural Formula Of Insulin Aspart-xjhz (Image 01)

Figure 1. Structural Formula Of Insulin Aspart-xjhz (Image 01)
Chemical structure diagram showing the amino acid sequence of the active ingredient insulin aspart-xjhz as per the product label for KIRSTY injection solution.*
FDA Label Image

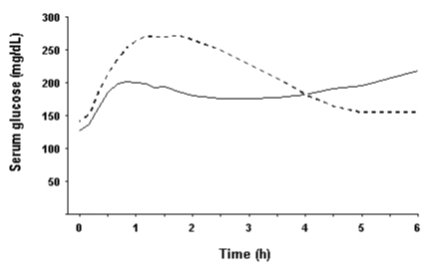
Figure 2. Serial Mean Serum Glucose Collected Up To 6 Hours Following A Single 0.15 Units/kg Pre-meal Dose Of Insulin Aspart (solid Curve) Or Regular Human Insulin (hatched Curve) Injected Immediately Before A Meal In 22 Patients With Type 1 Diabetes (Image 02)

Figure 2. Serial Mean Serum Glucose Collected Up To 6 Hours Following A Single 0.15 Units/kg Pre-meal Dose Of Insulin Aspart (solid Curve) Or Regular Human Insulin (hatched Curve) Injected Immediately Before A Meal In 22 Patients With Type 1 Diabetes (Image 02)
A line graph depicting serum glucose levels (mg/dL) over time (hours). The graph shows two distinct curves, one as a dashed line and the other as a solid line, illustrating changes in glucose concentration from 0 to 6 hours.*
FDA Label Image

Figure 4 (Image 03)

Figure 4 (Image 03)
A line graph showing free serum insulin concentration (mU/L) over time (hours). The y-axis represents free serum insulin levels, while the x-axis shows time in hours, illustrating insulin concentration changes post-administration.*
FDA Label Image

Instructions For Use Prefilled Pen (Image 04)

Instructions For Use Prefilled Pen (Image 04)
An instructional illustration showing the components of the KIRSTY insulin aspart-xjhz injection pen. Visible parts include the pen cap, rubber stopper, cartridge with cartridge scale, dose selector with pointer, and the push-button for injection. The label on the cartridge displays the product name KIRSTY and the generic name insulin aspart-xjhz.*
FDA Label Image

Image-5 Instructions For Use Vial (Image 05)

Image-5 Instructions For Use Vial (Image 05)
An illustration diagram showing a vial with a tamper-resistant cap and a rubber stopper located under the cap, indicating the vial's sealing components for injection solution.*
FDA Label Image

Image-6: Instructions For Use Dose Vial (Image 06)

Image-6: Instructions For Use Dose Vial (Image 06)
An illustration showing a hand holding a small vial, likely depicting the proper way to hold a vial of injection solution for administration or preparation. The vial is held between the thumb and index finger.*
FDA Label Image

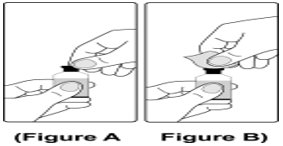
Image-7: Instructions For Use Vial Figures A And B (Image 07)

Image-7: Instructions For Use Vial Figures A And B (Image 07)
An instructional diagram showing two steps (Figure A and Figure B) of handling a vial. Figure A depicts a person holding a vial with one hand while using the other hand to lift a protective cap or seal from the vial's top. Figure B illustrates the person removing the cap completely from the vial, preparing it for use.*
FDA Label Image

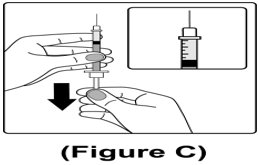
Image-8: Instructions For Use Vial Figure C (Image 08)

Image-8: Instructions For Use Vial Figure C (Image 08)
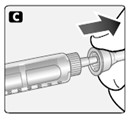
An instructional diagram labeled Figure C showing hands using a syringe and vial. The main image depicts one hand holding a vial while the other hand inserts a syringe needle into the vial, indicated by a downward arrow. An inset image shows a close-up of the syringe filled with liquid, illustrating correct preparation technique for injection solution.*
FDA Label Image

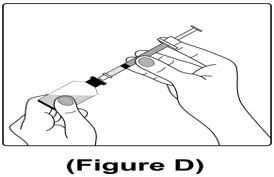
Image-9:instructions For Use Vial Figure D (Image 09)

Image-9:instructions For Use Vial Figure D (Image 09)
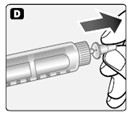
An instructional diagram labeled Figure D showing a person using both hands to insert a syringe needle into a vial or cartridge. One hand holds the vial steady while the other pushes the syringe plunger, illustrating the process of drawing medication from the vial into the syringe.*
FDA Label Image

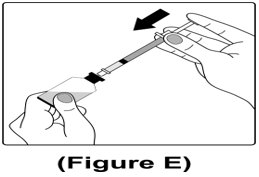
Image-10:instructions For Use Vial Figure E (Image 10)

Image-10:instructions For Use Vial Figure E (Image 10)
An instructional illustration labeled Figure E depicting a hand holding a vial and a syringe, with an arrow indicating the action of inserting the syringe needle into the vial for drawing medication.*
FDA Label Image

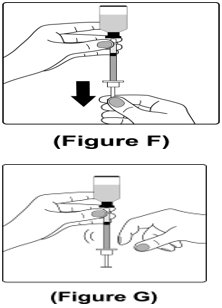
Image-11:instructions For Use Vial Figures F And G (Image 11)

Image-11:instructions For Use Vial Figures F And G (Image 11)
Two instructional illustrations labeled Figure F and Figure G. Figure F shows a hand holding a vial upside down and a syringe positioned below it with a downward arrow indicating to draw the solution. Figure G shows the syringe and vial in the hand with the other hand adjusting the syringe plunger, depicting preparation steps for injection solution.*
FDA Label Image

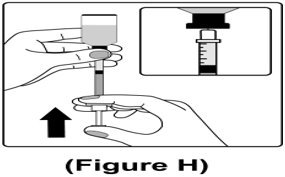
Image-12:instructions For Use Vial Figure H (Image 12)

Image-12:instructions For Use Vial Figure H (Image 12)
An instructional illustration showing hands drawing a solution from a vial into a syringe. The smaller inset highlights the syringe tip within the vial stopper. The figure is labeled as 'Figure H'.*
FDA Label Image

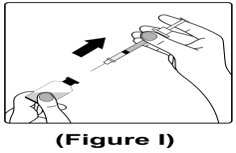
Image-13:instructions For Use Vial Figure I (Image 13)

Image-13:instructions For Use Vial Figure I (Image 13)
An instructional illustration showing a hand holding a syringe with the thumb and forefinger, preparing to remove a cap or protective cover by pulling it upward, indicated by an arrow. A second hand is holding a vial or vial cap. This image likely demonstrates the initial step in preparing an injection.*
FDA Label Image

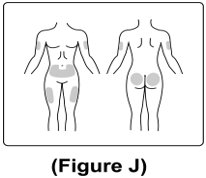
Image-14:instructions For Use Vial Figure J (Image 14)

Image-14:instructions For Use Vial Figure J (Image 14)
An anatomical illustration showing front and back views of a human torso and legs, highlighting recommended injection sites for a drug. Shaded areas include the abdomen, thighs, and upper buttocks, indicating possible subcutaneous injection locations.*
FDA Label Image

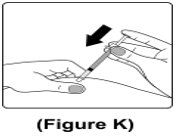
Image-15:instructions For Use Vial Figure K (Image 15)

Image-15:instructions For Use Vial Figure K (Image 15)
An instructional diagram labeled 'Figure K' showing a hand holding a syringe with a needle angled downward, positioned above a vial or stopper. An arrow indicates the direction of pushing or pulling the syringe plunger, demonstrating how to draw liquid into the syringe from the vial.*
FDA Label Image

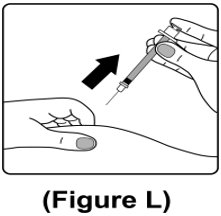
Image-16:instructions For Use Vial Figure L (Image 16)

Image-16:instructions For Use Vial Figure L (Image 16)
An instructional illustration showing a hand injecting a solution into the skin with a syringe. The image depicts a person holding the syringe and inserting the needle at an angle into the subcutaneous tissue of the arm, indicated by an upward arrow. This figure demonstrates the proper method for intravenous or subcutaneous injection.*
FDA Label Image

Figure 3. Mean Blood Glucose Profiles Following Intravenous Infusion Of Insulin Aspart (hatched Curve) And Regular Human Insulin (solid Curve) In 16 Patients With Type 1 Diabetes. R Represents The Time Of Autonomic Reaction. (Image 17)

Figure 3. Mean Blood Glucose Profiles Following Intravenous Infusion Of Insulin Aspart (hatched Curve) And Regular Human Insulin (solid Curve) In 16 Patients With Type 1 Diabetes. R Represents The Time Of Autonomic Reaction. (Image 17)
A line graph showing mean blood glucose levels (mg/dL) over time (minutes) with measurements from before and after a reference time point (R). Two closely aligned lines with error bars depict glucose trends, with values decreasing prior to R and increasing afterward. The x-axis represents time in minutes, and the y-axis shows blood glucose concentration.*
FDA Label Image

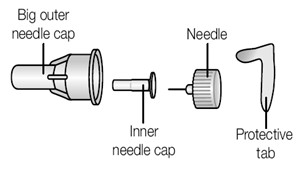
Instructions For Use Prefilled Pen Ultra-fine (Image 18)

Instructions For Use Prefilled Pen Ultra-fine (Image 18)
An instructional diagram depicting four parts of an injection needle assembly: a big outer needle cap, an inner needle cap, the needle itself, and a protective tab. The illustration shows the sequence and positioning of these components relative to each other.*
FDA Label Image

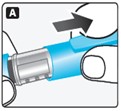
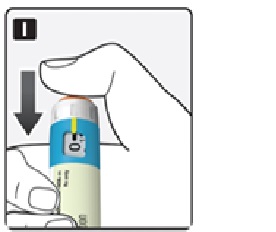
Instructions For Use Prefilled Pen Figure A (Image 19)

Instructions For Use Prefilled Pen Figure A (Image 19)
An instructional illustration showing a close-up of a hand holding a blue injection pen. The image depicts the hand gripping the pen with a thumb pressing on the top to activate or adjust the device, likely related to administration or preparation of an injectable drug such as insulin aspart.*
FDA Label Image

Instructions For Use Prefilled Pen Figure B (Image 20)

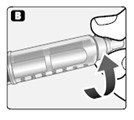
Instructions For Use Prefilled Pen Figure B (Image 20)
An instructional illustration showing a person peeling back a protective film from a pen-shaped device, likely an insulin injection pen. The image emphasizes the removal of a transparent cover or seal on the device, preparing it for use.*
FDA Label Image

Instructions For Use Prefilled Pen Figure C (Image 21)

Instructions For Use Prefilled Pen Figure C (Image 21)
Illustration showing a hand holding a syringe-like pen device, with the fingers turning the cap or dial in the direction indicated by an arrow, likely depicting preparation or activation steps for injection.*
FDA Label Image

Instructions For Use Prefilled Pen Figure D (Image 22)

Instructions For Use Prefilled Pen Figure D (Image 22)
An instructional illustration depicting a hand removing a cap from the end of a syringe or pen device, with an arrow indicating the direction of cap removal. The image is labeled with the letter 'D' in the corner.*
FDA Label Image

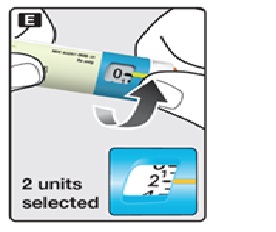
Instructions For Use Prefilled Pen Figure E (Image 23)

Instructions For Use Prefilled Pen Figure E (Image 23)
An instructional illustration showing a close-up of a person selecting a dose on an insulin pen labeled 'KIRSTY'. The dial indicates '2 units selected' with a magnified inset highlighting the dose window displaying the number 2. This diagram demonstrates how to adjust the injection dose on the pen device.*
FDA Label Image

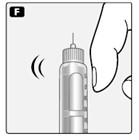
Instructions For Use Prefilled Pen Figure F (Image 24)

Instructions For Use Prefilled Pen Figure F (Image 24)
An instructional illustration showing a hand holding an insulin pen injection device. The image depicts the action of pressing the top of the pen, indicated by motion lines, suggesting the injection or dose delivery mechanism for insulin aspart-xjhz solution.*
FDA Label Image

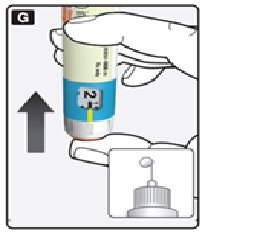
Instructions For Use Prefilled Pen Figure G (Image 25)

Instructions For Use Prefilled Pen Figure G (Image 25)
An instructional illustration showing a hand holding an injectable vial labeled with the number '2'. An arrow points upward, indicating the vial should be pulled up from a device or holder shown in an inset below. The image likely demonstrates part of preparation or administration for an injectable drug product.*
FDA Label Image

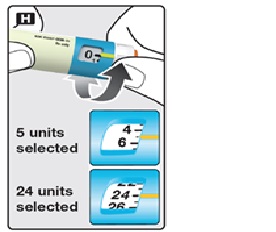
Instructions For Use Prefilled Pen Figure H (Image 26)

Instructions For Use Prefilled Pen Figure H (Image 26)
Illustration showing the dosing selection mechanism on a KIRSTY insulin aspart-xjhz injection pen. The image indicates how to select different unit doses, highlighting 5 units and 24 units as examples, with rotating dial visuals for dose adjustment.*
FDA Label Image

Instructions For Use Prefilled Pen Figure I (Image 27)

Instructions For Use Prefilled Pen Figure I (Image 27)
An instructional illustration showing a hand removing the cap from a vial of medication. The vial is partially visible with a label and a colored cap, demonstrating the initial step of vial preparation for injection.*
FDA Label Image

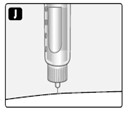
Instructions For Use Prefilled Pen Figure J (Image 28)

Instructions For Use Prefilled Pen Figure J (Image 28)
An instructional illustration showing a needle attached to an insulin pen injector poised over skin, likely demonstrating proper injection technique for subcutaneous or intravenous administration of the insulin aspart-xjhz solution.*
FDA Label Image

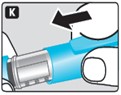
Instructions For Use Prefilled Pen Figure K (Image 29)

Instructions For Use Prefilled Pen Figure K (Image 29)
An illustration showing a close-up of a blue insulin pen injection device with a hand preparing or adjusting the pen by gripping the cap or top section. The image suggests an instructional step related to the use of the insulin aspart-xjhz injection pen device.*
FDA Label Image

Image-33 (Image 33)

Image-33 (Image 33)
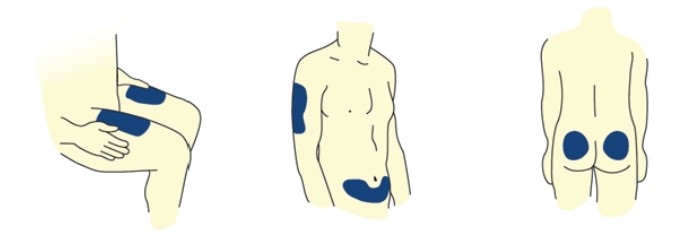
Illustration showing recommended injection sites for the drug KIRSTY (insulin aspart-xjhz) injection, solution. The blue shaded areas indicate the thigh, upper arm, abdomen, and buttocks as appropriate locations for subcutaneous or intravenous administration.*
FDA Label Image

Image-34 (Image 34)

Image-34 (Image 34)
Packaging label for Kirsty (insulin aspart-xjhz) injection, 100 units/mL (U-100), 10 mL multiple-dose vial. Labeled for intravenous or subcutaneous use with a U-100 syringe. Store refrigerated at 2°C to 8°C until first use; room temperature storage up to 30°C allowed for 28 days. Manufactured by Biocon Biologics Inc. Product of Malaysia.*
FDA Label Image

Image-35 (Image 35)

Image-35 (Image 35)
Kirsty (insulin aspart-xjhz) injection, 100 units/mL (U-100) solution in 3 mL prefilled pens, for subcutaneous use. The label shows a sealed carton containing five prefilled pens. Manufactured by Biocon Biologics Inc., with directions noting it is for single patient use only and does not include needles. The design includes dosage and storage information with the brand and generic names prominently displayed.*
FDA Label Image

Image-36 (Image 36)

Image-36 (Image 36)
Packaging label for Insulin Diluting Medium for Kirsty, a 10 mL single-dose vial solution. The label indicates it is to be used only with Kirsty and specifies that the product does not contain insulin. Manufactured by Biocon Biologics Inc., the label includes storage and dilution instructions, ingredient information, barcode, and NDC 83257-006-11.*

* About these descriptions: Image descriptions on this page are generated by automated AI analysis of the product label images from the manufacturer's FDA label submission (SPL). They are provided for reference only and may contain errors or omissions. Always rely on the printed label itself and the official FDA labeling, and consult a pharmacist or healthcare professional with any questions about this product.